This is an antenna created out of total frustration, aggravation, irritation and any other **tation imaginable. The reason for this antenna was when WD5EXQ retired and moved about 75 miles into the local countryside we could not talk to each other on any band, 160, 75, or 40 meters. This went on for several years, with signal levels from S1 to S nothings, which really aggravated us to no end. I tried reorienting the ends of the antenna as much as I could with no results. I even tied the end of a 300-ohm feedline together and loaded up the resultant antenna on both 160 and 75 meters without results.
Finally, I decided to add another wire to the 40 meter dipole to see what that would do for my signal in his direction. Now my inverted V had its center at 45 feet up and the ends at 15 ft and 20 ft high. One of the ends is pulled about 20 feet out of line from the other. There are no utility wires in the areas. All are buried, so that was no problem, no re-radiation and cancellation from the power lines or any other lines. So, all I could come up with was that there must be a skip zone, dead zone or whatever between his QTH and mine. Either way, no communications, for whatever reason.
So, I lowered the antenna, soldered a carefully uncalculated length of #12 wire to one side of the antenna and hauled it back up. Then took the added wire end out to the fence and poked it through a hole in a 6-ft. length of PVC pipe, tied the pipe to the fence and loaded up the antenna. That solved the problem! I was able to communicate in all bands where I could not before. That was really satisfying and I had no problems on 160 even with high-noise levels. 75 meters was also very good, with excellent signal levels on both ends. Last but not least, 40 meters worked just as well during the day, and night communications were fine all over the country. As a bonus, I found out the antenna worked well on the 18 MHz band and was able to make several contacts there. I had no success on 18 MHz before possibly due to a very high angle of radiation.
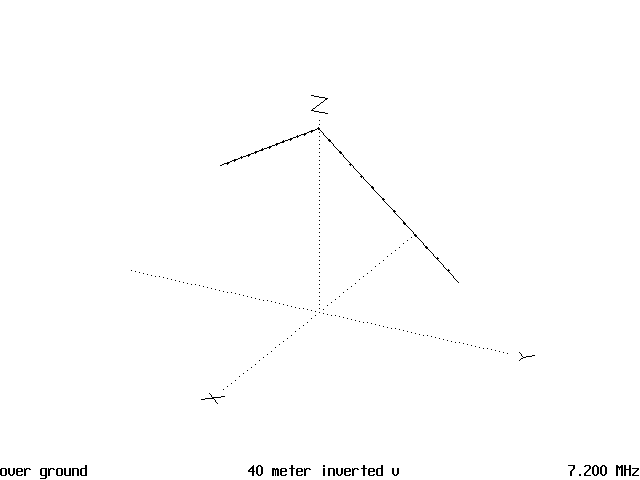
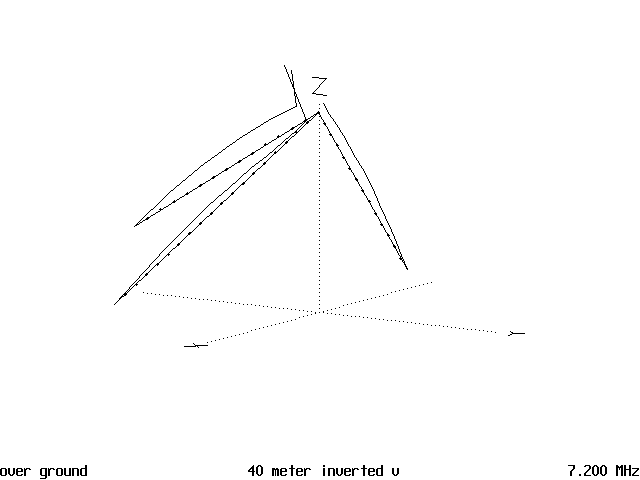
So, on to the diagrams. Figure 1 is a diagram of the antenna with no other conductors around it, such as the wiring in the house. The element on the left side is the element that is pulled forward 20 ft.
The Tripole Antenna - Figure 1
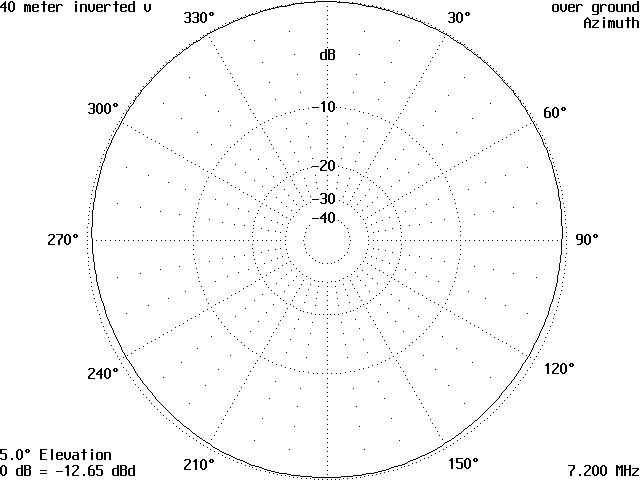
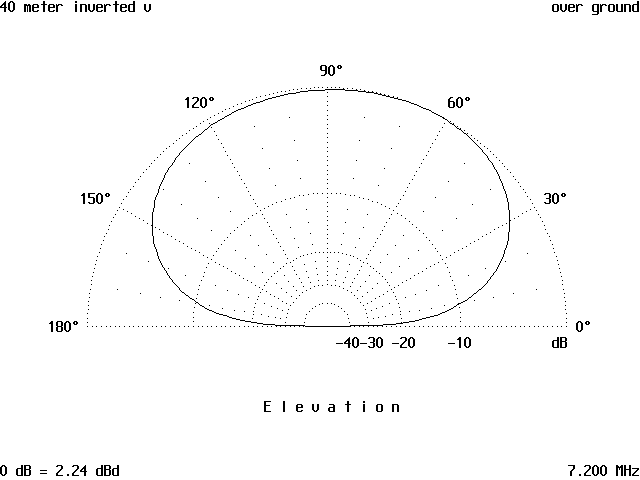
Figure 2 is the horizontal radiation pattern and is for all practical purposes, a circle. The gain figure of -12.47 dB is measured at a 5-degree elevation and is not a factor in this discussion.
The Tripole Antenna - Figure 2
Figure 3 is the current distribution along the antenna legs, with the current phase being ignored.
The Tripole Antenna - Figure 3
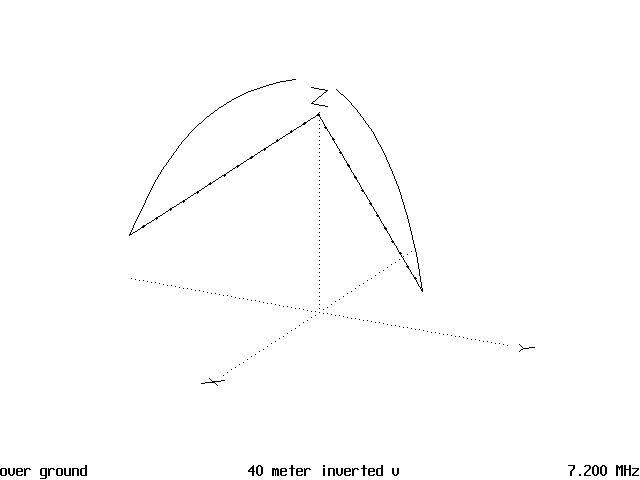
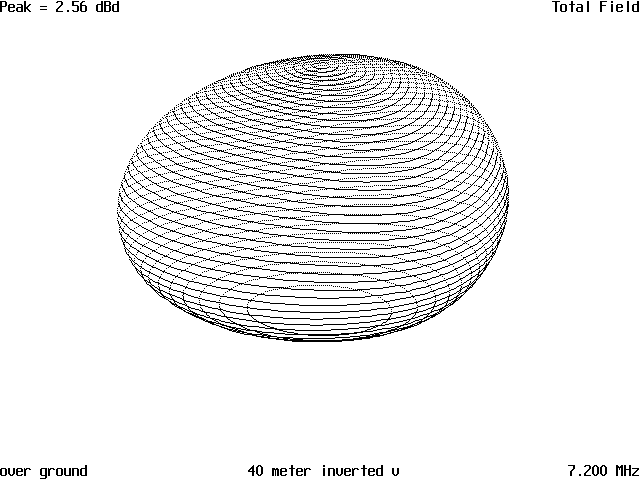
Figure 4 is a 3D representation of the pattern, with the small circle being at ground level and the viewing point is from about 30 degrees looking down at the antenna from the side and a few degrees off of the end of the legs.
The Tripole Antenna - Figure 4
Figure 5 is the vertical radiation pattern and as you can see, all of the radiation is nearly straight up, with nearly all of the power being radiated between 30 and 150 degrees. This results in good coverage in the day for about 600 miles out from my home.
The Tripole Antenna - Figure 5
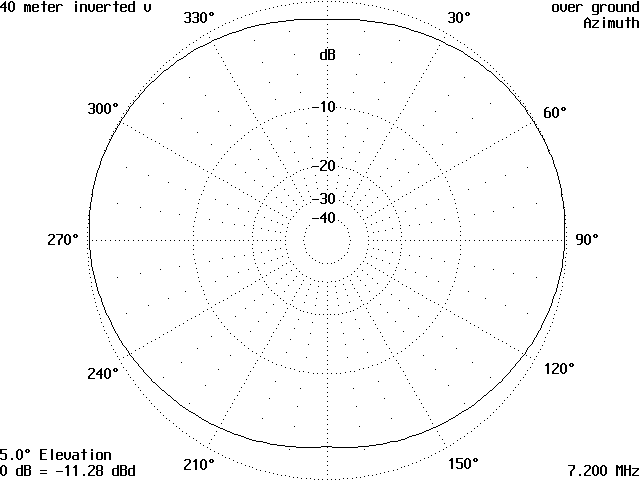
Figure 6 is the 40-meter horizontal pattern after the third wire was added and it shows a slight squeezing at 0 degrees and at 180 degrees.
The Tripole Antenna - Figure 6
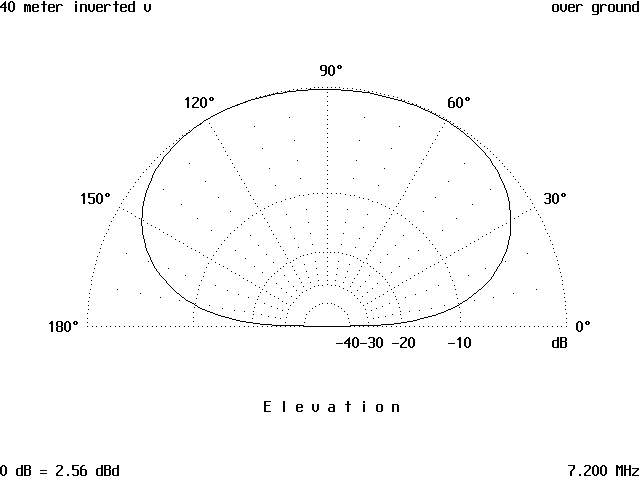
Figure 7 is the vertical pattern after the extra wire was added. Notice there is a shift of the maximum power lobe from straight up at 90 degrees to very close to a 60 to 70 degree angle.
The Tripole Antenna - Figure 7
Figure 8 is the 3D pattern of the three-wire antenna and it shows the shift from 90 degrees to 70-60 degrees as a peak above the smallest circle, which is at 90 degrees. This view is from the X-axis, dead in front of the antenna, about 35 degrees up from the horizon.
Apparently, this was enough shift in the vertical pattern to bring my signal up at WD5EXQs’ QTH. I also noticed an increase in signals on 160 meters, out to 400 miles. I will point out that this is not a good antenna on 160, but it works for the ranges I needed to cover. The antenna loaded up and worked well on 75 meters, but I didn’t include any patterns here since they were very close to the ones on 40.
Figure 9 is the current distribution on 40 meters and shows some interesting spikes at the feed point where the wire and the dipole element are connected.
The Tripole Antenna - Figure 9
Figure 10 is the horizontal pattern on 160 meters and the vertical pattern is not shown, as it was not that much different from the one on 75 and the 40-meter pattern.
The Tripole Antenna - Figure 10
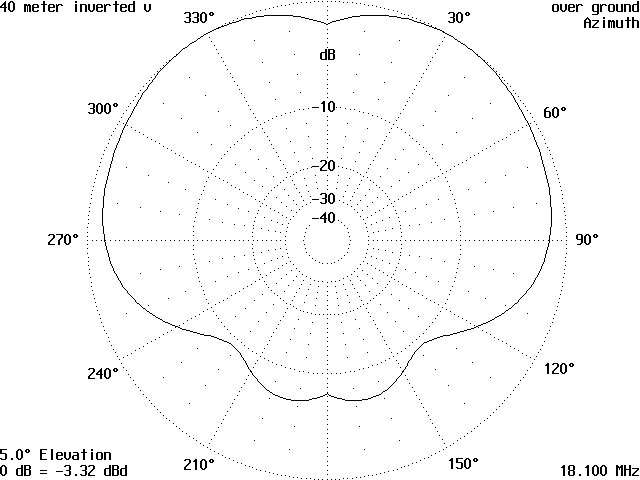
The pattern in Figure 11 is the horizontal pattern on 18.1 MHz and it shows a definite shift in direction towards the “front” of the antenna, in the direction that the one leg was pulled forward.
The Tripole Antenna - Figure 11
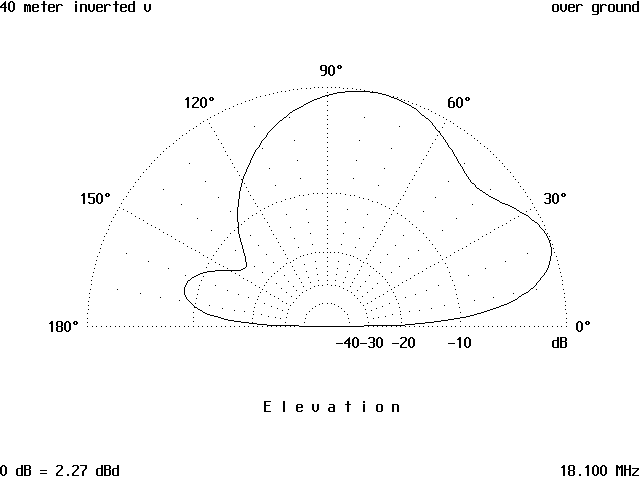
Figure 12 shows the vertical pattern and there is a small lobe at 20 degrees, which explained why I now have a good signal to the Northeast.
The Tripole Antenna - Figure 12
The last pattern Figure 13 is the 3D pattern of the antenna on 18.1 MHz. It is a little hard to see, but it looks like a fancy pastry.
So, now you have seen the results of unscientific and totally non-calculated antenna modification. I do intend to add a fourth wire later, also uncalculated as to length. Not very scientific, but it works, at least this time it did. Now, for more details.
The rig is a TS-430S. The feedline is 300-ohm TV lead-in and the tuner is an ancient Johnson 275-watt matchbox. The antenna is a dipole with the legs made up of 300-ohm twinlead, but not connected as a folded dipole. Transmitter power as measured on a Bird wattmeter is 100 watts. Antenna center is 45 ft. high, with one end 15 ft. high and the other end approximately 20-ft. high. The added wire is made of #12 solid copper and about 60-ft. long with the end about 6 ft. above the ground.
As an experiment, this one seems to do quite well for an antenna born of agitation and frustration. Sometimes this is all that can be done. Just throw up an antenna and see what happens.
Originally posted on the AntennaX Online Magazine by Richard Morrow, K5CNF