My Pine Bed Build
After the fun of a water tank leaking all over what was an upstairs workshop/office, and with no choice but to empty the room of the rubbish that was left I thought that what would be a good idea was to try a re-decorate the once old office and make it a long-needed bedroom.
I spent a few weeks emptying the room and getting rid of the crap basically!
This included ripping out all the workbenches, ditching all the wood and old trunking that went around the room and returning it to a blank canvas.
Once this was done, I was left filling all the holes in the walls from where the workbenches, electrical trunking and everything else that I had screwed to the walls around the room.
The start of this small project involved looking around Pintrest to see a few designs on Pine Beds that I liked, in doing this I also had to think of later making matching side tables and maybe even a Wardrobe or two.
Next I had to finalize the design, to do this I always make up the design in SketchUp, it’s not really a useful piece of software but it does the job, more often than not I get annoyed with the software and end up leaving it alone for an hour or so, especially as I am having to use a really old version as my old laptop is not really the best spec and the best version that will run on it is 2016.

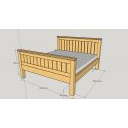

Once the fun of SketchUp was finished I got to work on the Cut List:
Bed Frame
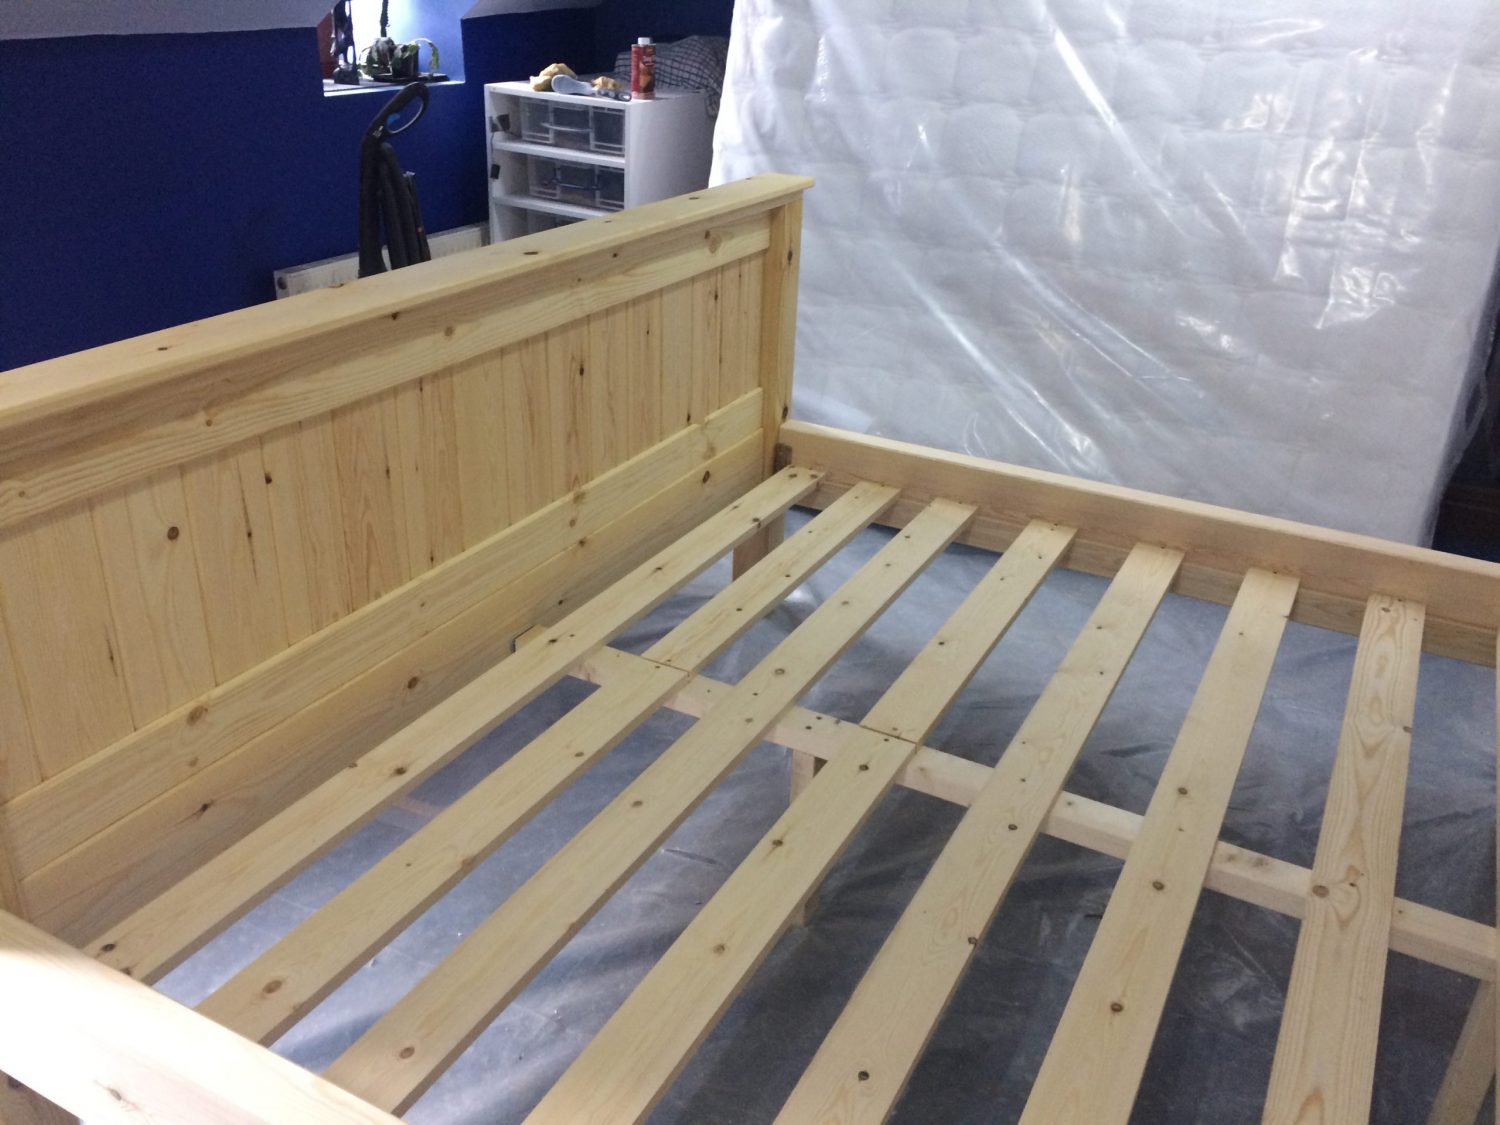
13 x 2cm (height) by 10cm (width) by 200cm (length) – Slats
1 x 2cm (height) by 10cm (width) by 210cm (length) – Center Support
2 x 2cm (height) by 6cm (width) by 210cm (length) – Slat Supports
2 x 6cm (height) by 18cm (width) by 210cm (length) – Bed Rails
Head Board
14 x 2cm (height) by 12cm (width) by 60cm (length) – Panneling
1 x 2cm (height) by 10cm (width) by 200cm (length) – Top Section
1 x 2cm (height) by 14cm (width) by 220cm (length) – Top Section
2 x 5cm (height) by 10cm (width) by 200cm (length) – Top and Bottom Small Rails
1 x 6cm (height) by 18cm (width) by 190cm (length) – Bed Rail
2 x 10cm (height) by 10cm (width) by 180cm (length) – Corner Posts
Foot Board
14 x 2cm (height) by 12cm (width) by 40cm (length) – Panaling
1 x 2cm (height) by 10cm (width) by 200cm (length) – Top Section
1 x 2cm (height) by 14cm (width) by 220cm (length) – Top Section
2 x 5cm (height) by 10cm (width) by 200cm (length) – Top and Bottom Small Rails
1 x 6cm (height) by 18cm (width) by 190cm (length) – Bed Rail
2 x 10cm (height) by 10cm (width) by 90cm (length) – Corner Posts
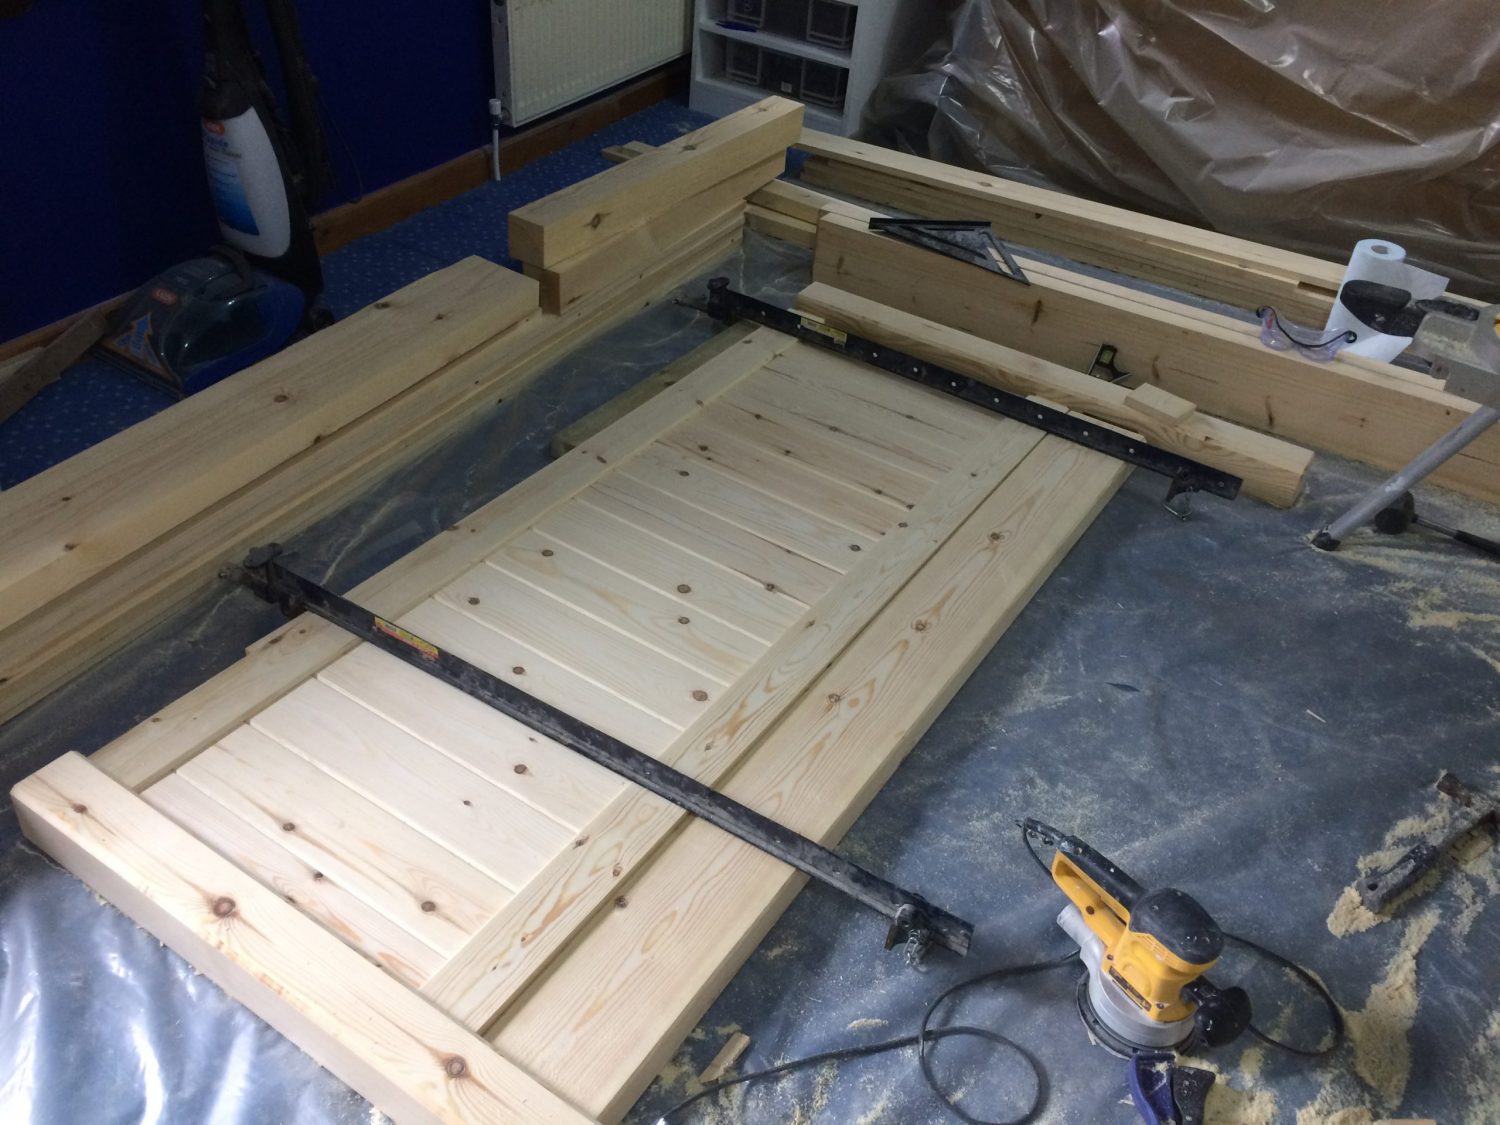
For the next part it involved popping down to the Woodward and selecting, cutting, and shoving the odd piece through the thicknesses and jointer until we ended up with a small selection of wood for the cat to keep an eye on.
The above list if measured correctly will give me a little leeway with regards to the lengths of the wood, this will come in useful later if I decide to change some of the measurements on the fly.
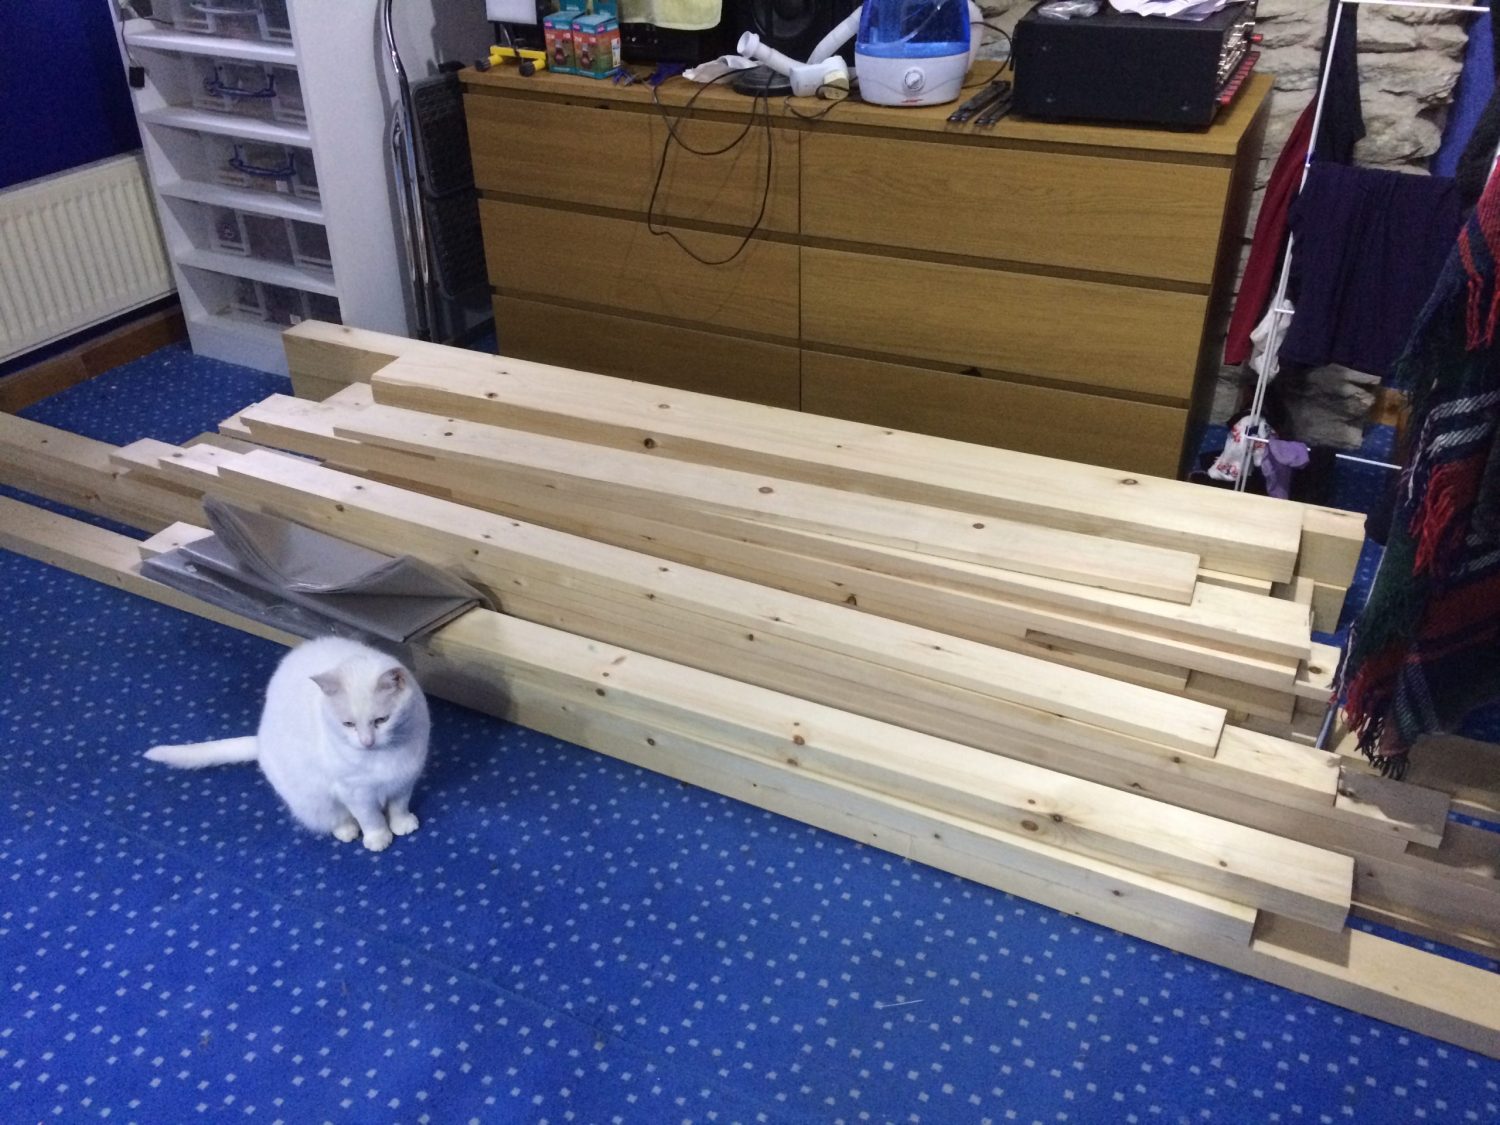
Another note here is that the Isle of Man has a complete lack of quality wood, for this I chose what they call here ‘Red Wood’, more like ‘White Wood’ and as close to a pine as you can get, the guys at the wood yard are quite helpful though, we had to hunt through quite a lot of wood to find some wood that had no splits, knots that looked nice, and the most cost effective lengths to meet my needs…
With all that has happened of late I have run out of space to do any work, so the ex-office / new bedroom is now also the workshop, well for the next 3 days anyway…
So, a quick trip to B&Q for some polythene sheets to at least save me from having to re-wash the floor…
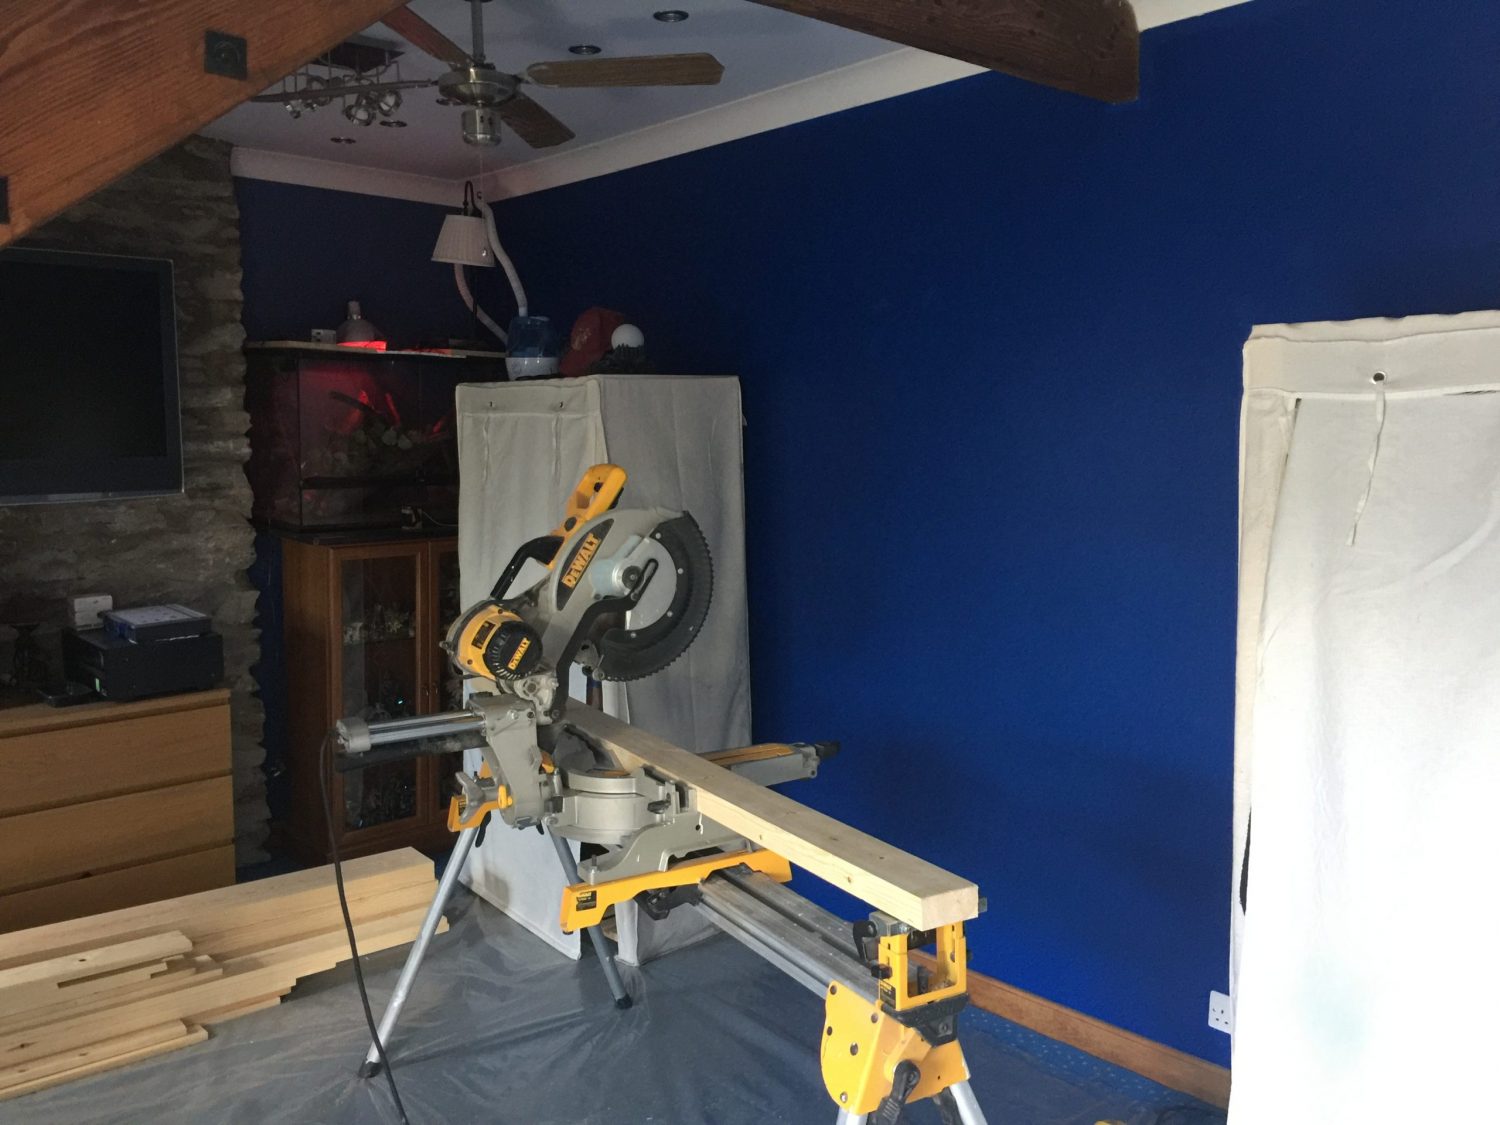
The first job was to make the headboard, the width of which I could take off the next mattress that has been delivered (standing behind the chop saw).
The only thing to remember here was that with the uprights being 10cm square, I needed to make sure that the width would be correct once the brackets are installed for the bed frame, thankfully this was straight forward. and all the wood for the rails on the headboard were cut to the right width but also adding 4cm at each end for the tenons.
The main Pine Bed rail at the bottom of the headboard will have floating tenons, this is only just to make my life easier for a change.
The tenons for the top and lower rails (5cm x 10cm) are very quickly cut using the chop saw, once these were cut, they were cleaned up later with a chisel.
The fun started when I wanted to cut the mortises, not having access to a mortiser and with absolutely no idea as to where my Trend Mortise and Tenon Jig is (not seen for 4 years now) and with the lack of tools I decided to cut the holes with the use of a router, so some careful measurements here are needed to make sure that when they are cut that not only will the tenons fit, but that they will not be too high or low so that gaps appear.
This went quite well, I used a 15mm cutter so that I had to make two passes in each hole to get the width correct, but this worked out much better than if I had used the correct size cutter, as if I had made a mistake it would have been a complete nightmare to rectify.
Below is a photo of one of the many dry fits I made to check all fitted together before gluing.
I also changed how the panels were going to be fitted during this stage, I was going to use my Biscuit Jointer to lock them in place but I am in need of a new blade in the chop saw and thus the edges of this softwood is not really as nice as I would wish for, so instead I routed out a 5mm groove in both of the smaller rails so that they will slide into place, the only issue here was the fun involved at holding the two rails and feeding the panelling into the grooves, the answer was to use the sash clamps and also fit one end into the uprights (legs).
Sash Clamps are only ‘So’ big! so I had a few clamp heads around, all I needed was a bit of wood to get them to the right length and then i have some more clamps! so with a quick glue up and a load of clamps and the odd beating with a rubber mallet the headboard was assembled and left to dry over night.

Notice the hand-made clamps! that’s the only problem working on something that is around 2 meters wide, they ended up being good enough though.
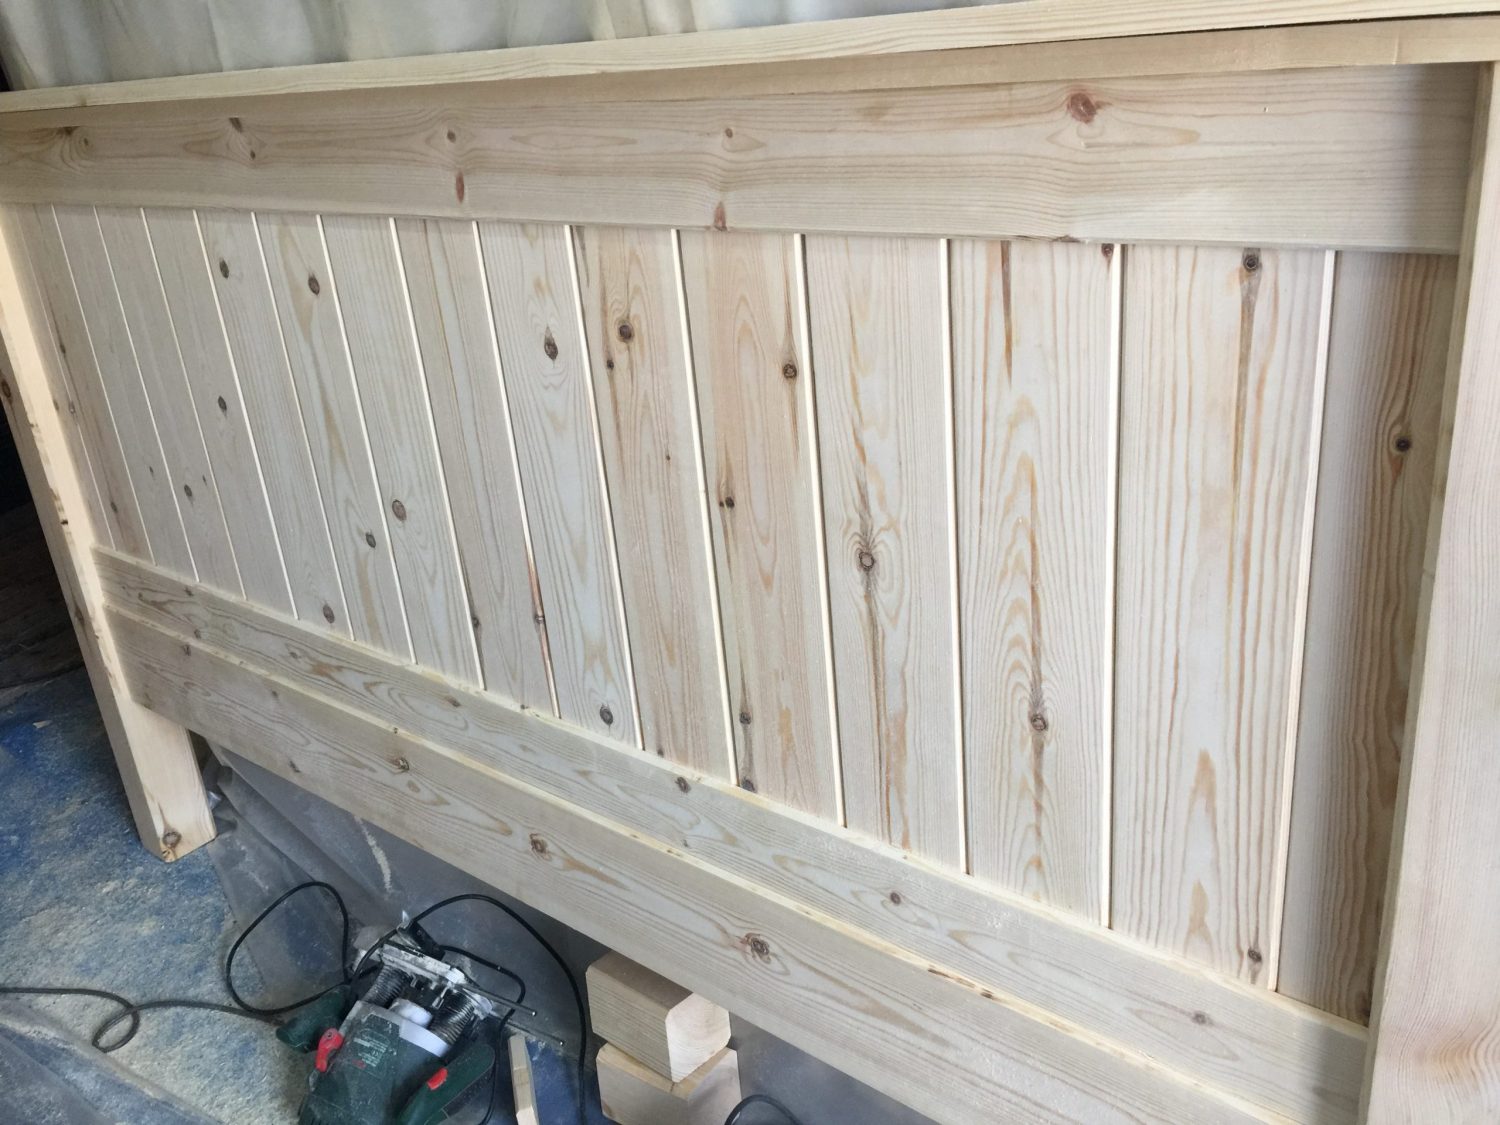
Just a close up showing off the chamfering, ignore the gap in the board at the top, at this point it was not glued or clamped down at this point.
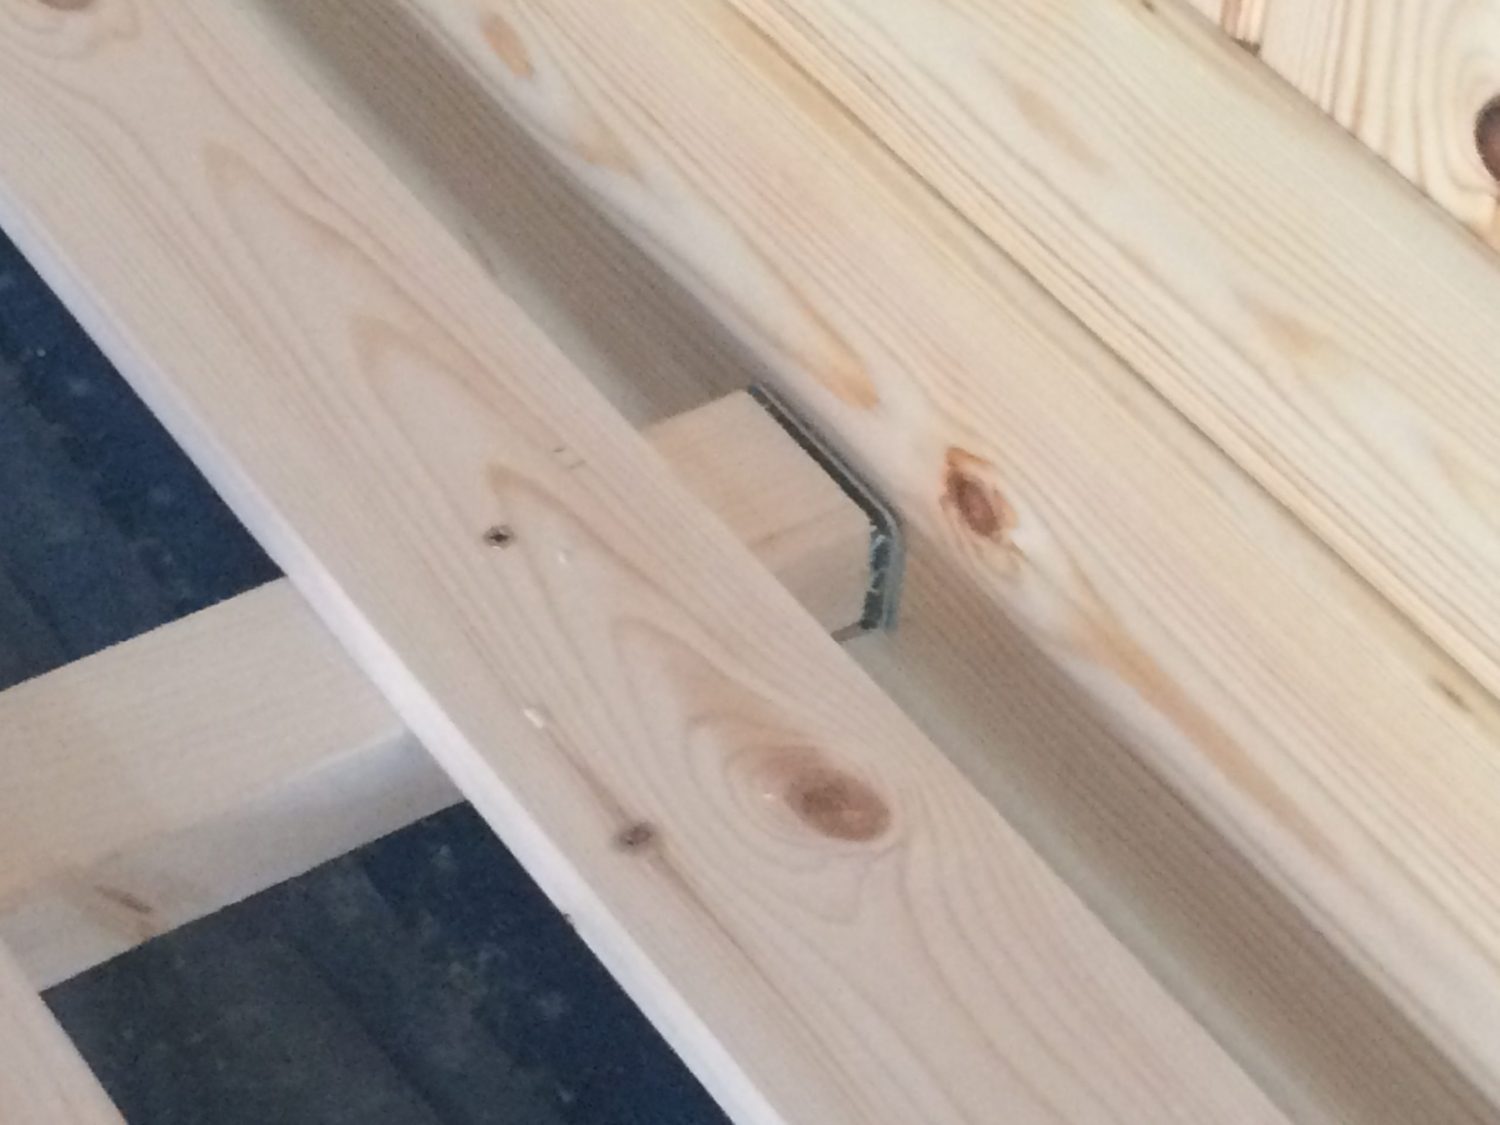
Once both the Headboard and the Footboard I just needed to take a router to the side rails and fit a small baton along each to fit the bed slats upon, the only slightly annoying part was the actual brackets that fit the ends to the rails, I tried to get these in the UK, but in the end I had to order them from eBay USA as I could not find anyone selling these type over here, I wanted these as they end up pulling the bed together and making it very solid, plus because of the weight of the wood alone I wanted something a bit on he strong side.

The center support was just measured out and fitted using a bit of spare CSL Pine.
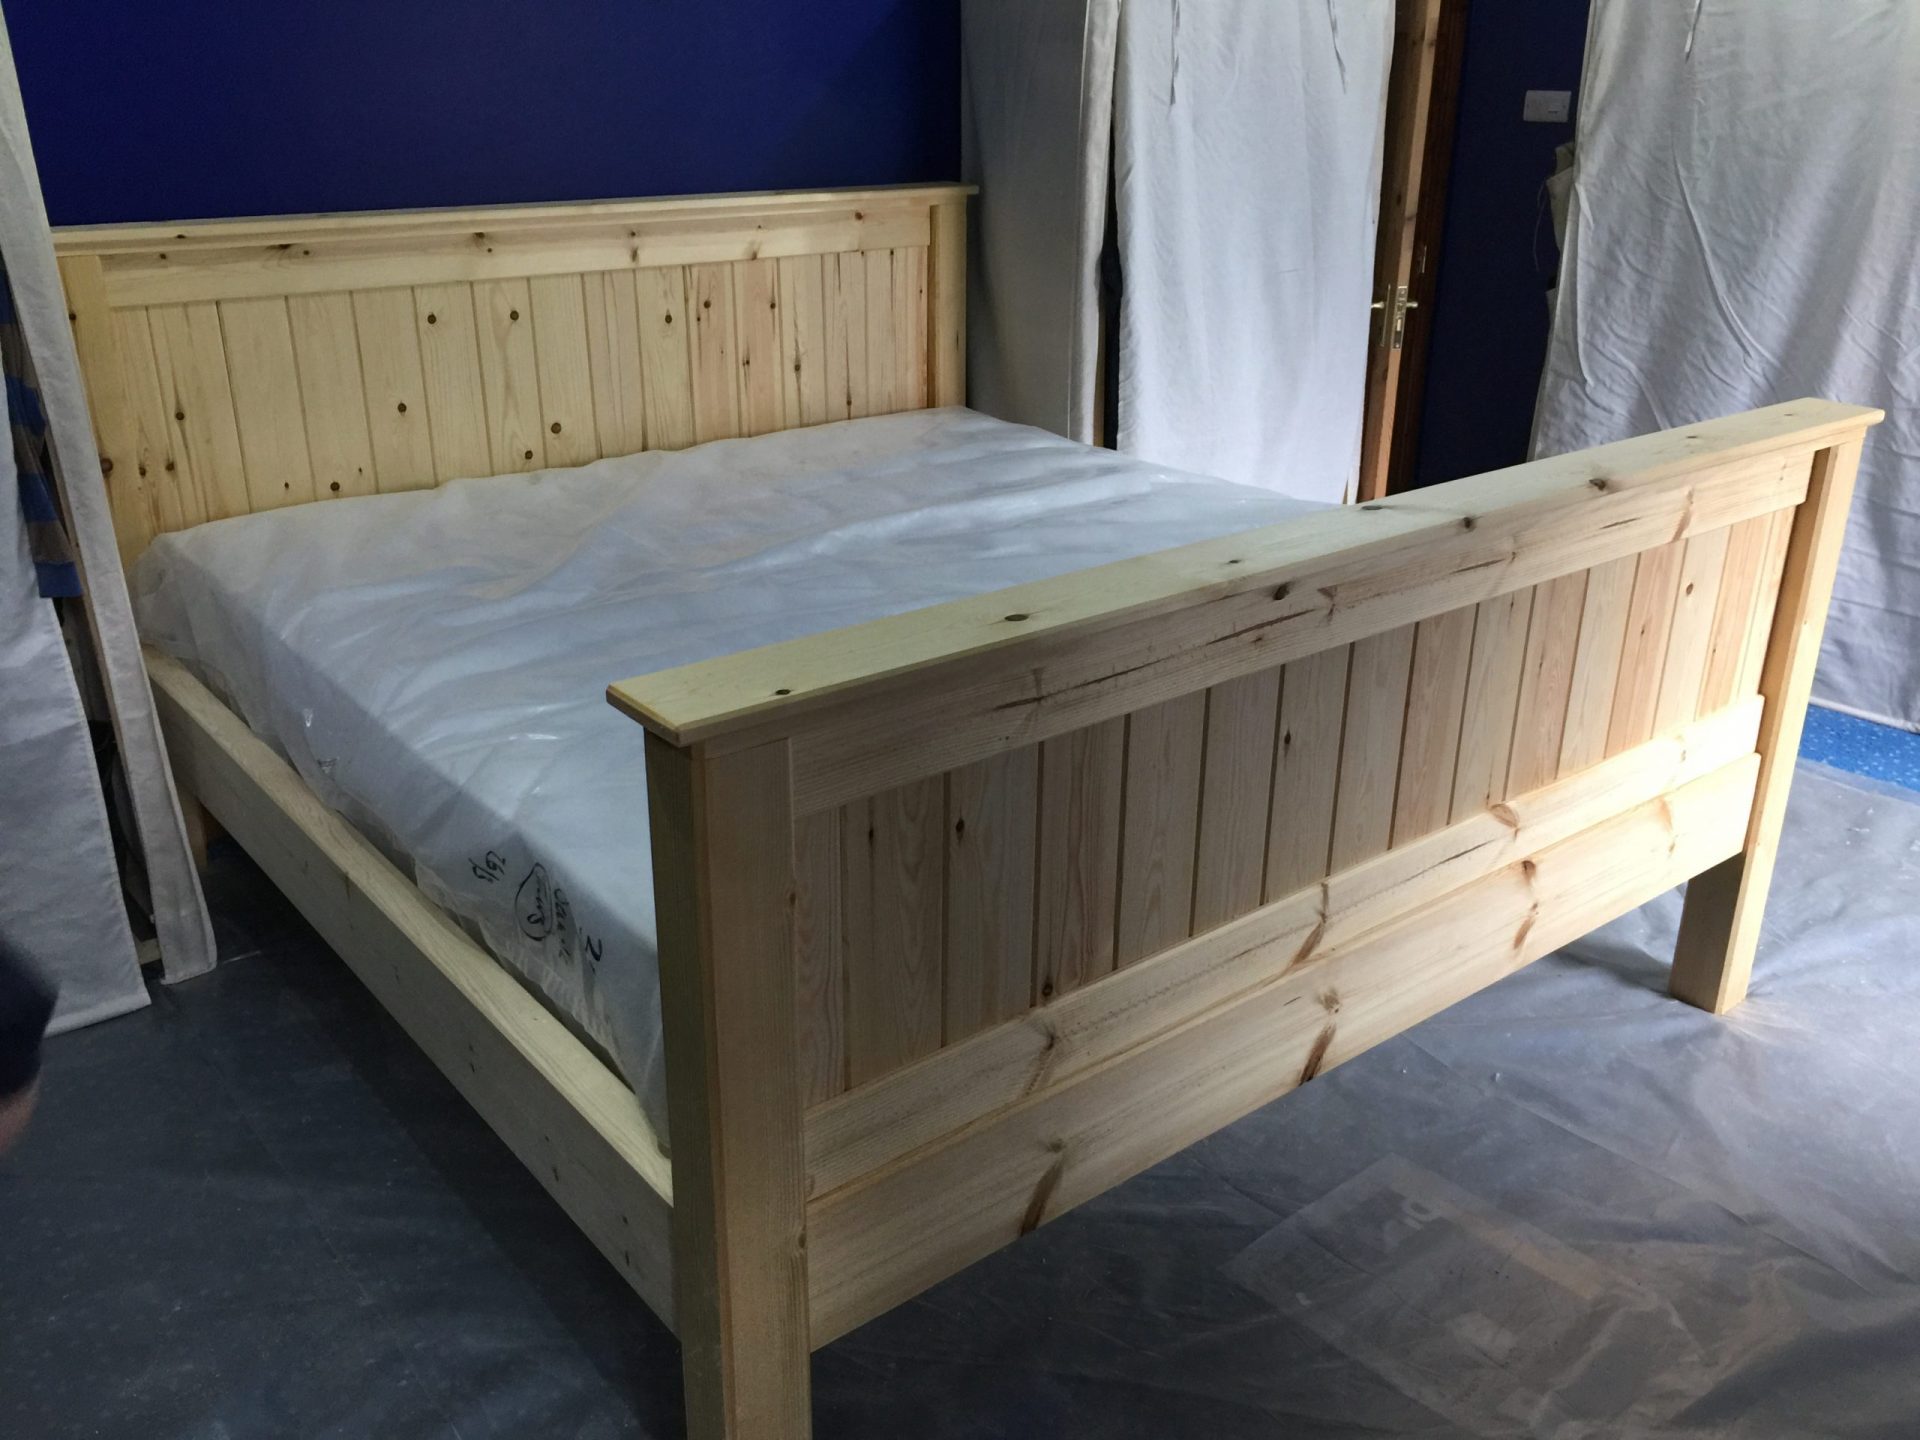
The finished Pine Bed now just waiting for the oil to go off, although the actual bed only took me three days to complete, it will take me another 4 days to finish oiling, I applied 2 coats of 50:50 mix of Pure Gum Turpentine and Natural Tung Oil, for this job you have to use proper as in real Turpentine, Substitute Turps from B&Q will not do at all. The only bad bit here is the stink! its basically the turps, the oil does not smell much.
Once the oil mix has dried I then applied 2 coats of pure 100% Tung Oil, this is then left to dry…
The finished Pine Bed now ready for making….

This was a good little project and gave me something to do, it was fun and a good trial run, I have an idea that I want to attempt a four poster next and use a CNC Router to add carvings to all the sides, though that will not be a quick job…