I have had a battle with monitors of late, especially on the Mac’s, and if it was not the monitors, it would be trying to get two monitors to align properly so that things just looked right.
The problem has always been that whatever I was doing I would always want to view multiple windows at the same time, for instance when working on websites I would have normally 3 windows displaying html, php, Wordpress and maybe another showing the SQL database contents, and on top of this I might need to have Photoshop and Illustrator open as well and there is just not enough space on 2 or 3 27” monitors.
If I am working on 3D or VFX/Video Editing projects, it can get very frustrating as there is never enough space, so I saved up and started looking for a suitable monitor.
My head is not in the ‘Gaming’ mode so although I knew that I would be looking for a so classified ‘Gaming Monitor’, I also knew that I wanted a ‘Curved’ display to save on the neck strain which seems to be a very prominent problem with a single big display.
I Need to connect the monitor to a Mac and maybe a Windows PC as well, So a USB-C Port would be perfect but not essential.
I would like a Resolution that the Mac can handle, so around 5K2K (7680 x 2160)
I want to mount the monitor on a arm which will offer me extra desk space.
It was not long before I notice that just two monitors stood out when it came to Ultrawide Monitors, these were the Samsung 57″ G95NC Odyssey Neo G9 240Hz Dual UHD Monitor and the Dell Ultra Sharp 40 Curved U4025QW Thunderbolt Hub Monitor.
There are some big differences between these monitors, the obvious is the large, curved display of the Samsung that is a enormous 57” wide, but the Dell, even though it is just 40”, it does have USB-C, which is perfect for the Mac Connectivity, and its added ports and a built in HUB offering KVM Switching is a smart choice and on first look the Dell’s features are impressive and would make it the smarter option, but for me the make being a ‘Dell’ is a tad problematic, I used to have a Top of the range Dell XPS Laptop, which broke just 5 months into owning it and Dell would not offer getting it services or replaced even though it was covered by a warranty, Since then I have got rid of all things Dell and vowed never to own another Dell product, so if anyone reading this should be aware that Dell as a company will ‘NOT’ honour any within warranty product, so if it ever goes wrong, then tuff, you have lost your money.
I did look at a lot of other makes of displays out there, even Iiyama which has never let me down over the years, but know one came close to offering a display that would have the resolution of 7680 x 2160, well except the huge Samsung 57” G95NC Odyssey Neo G9 240Hz Display.
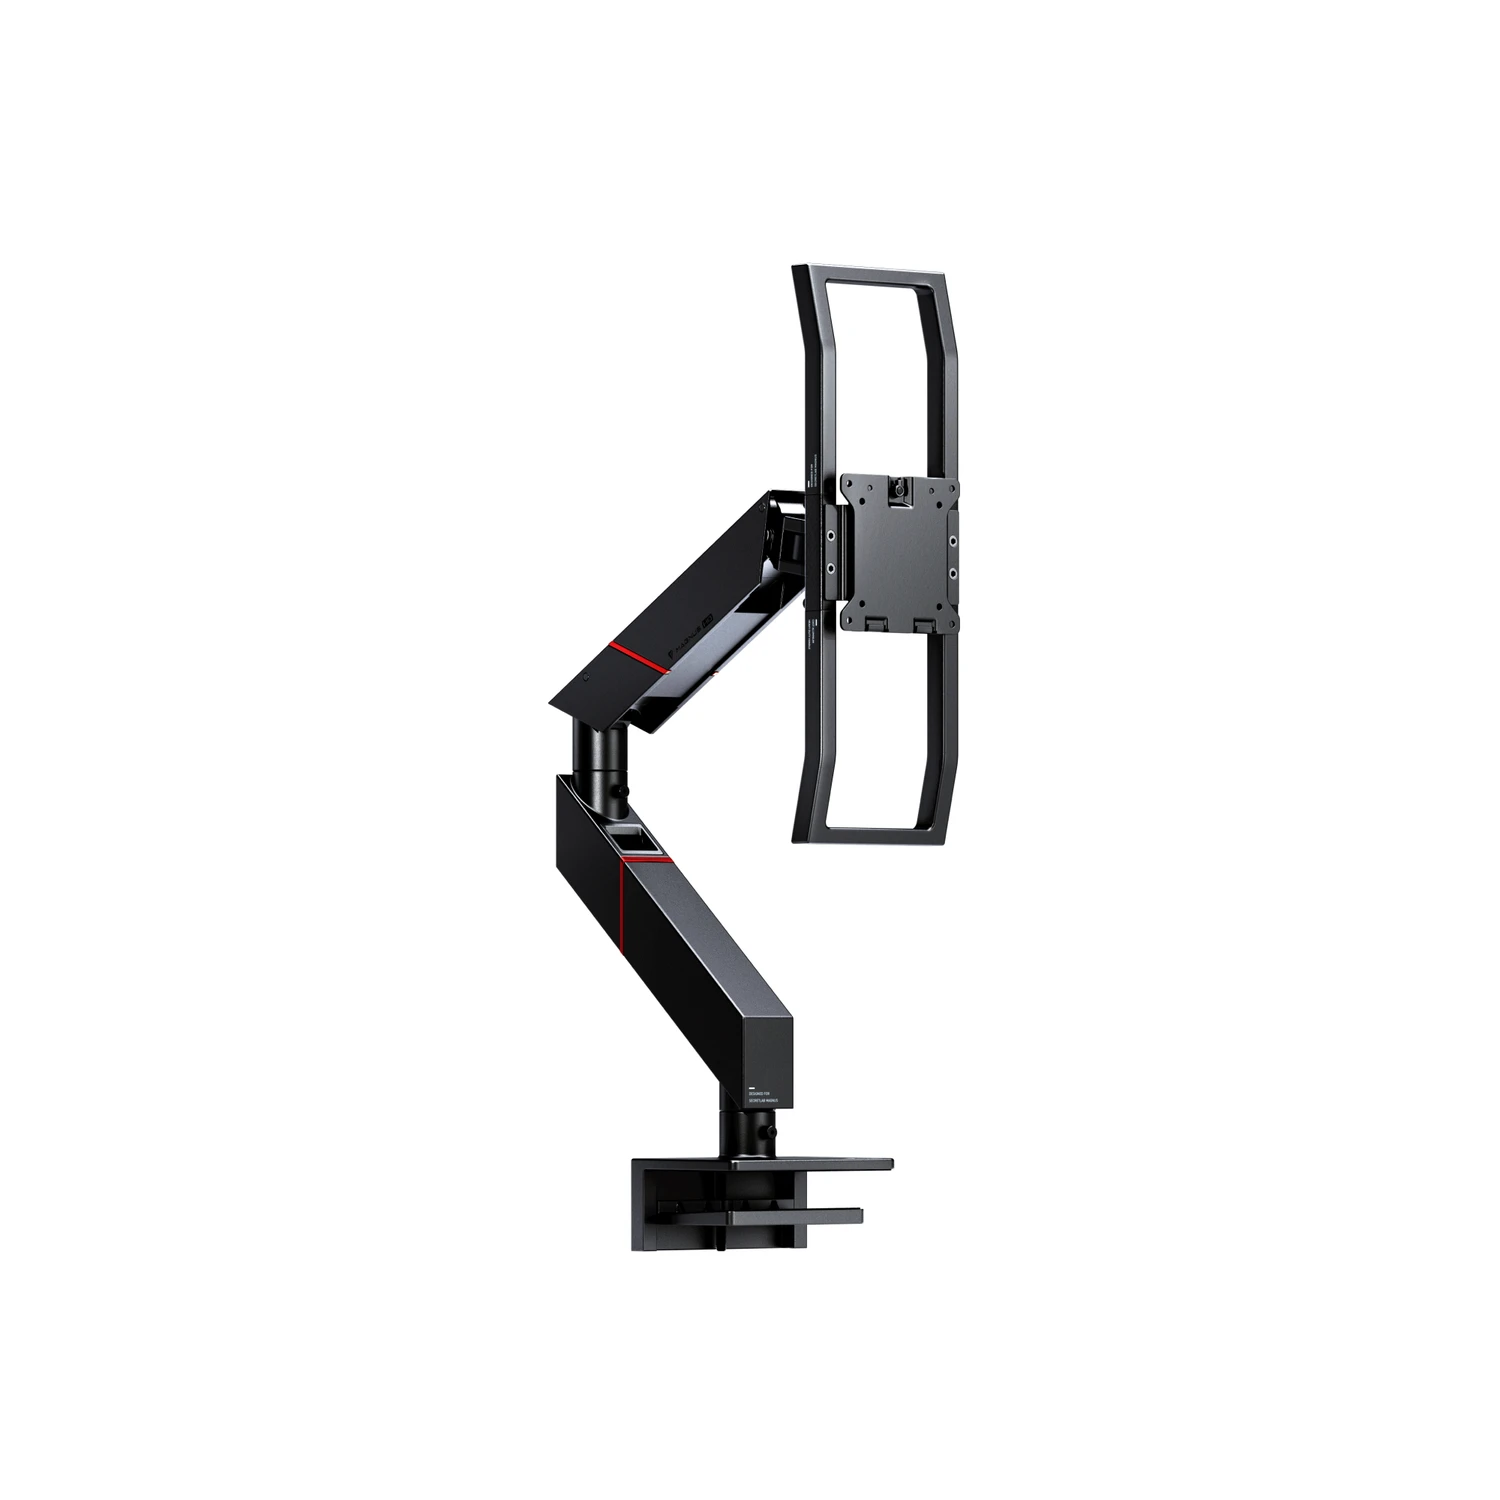
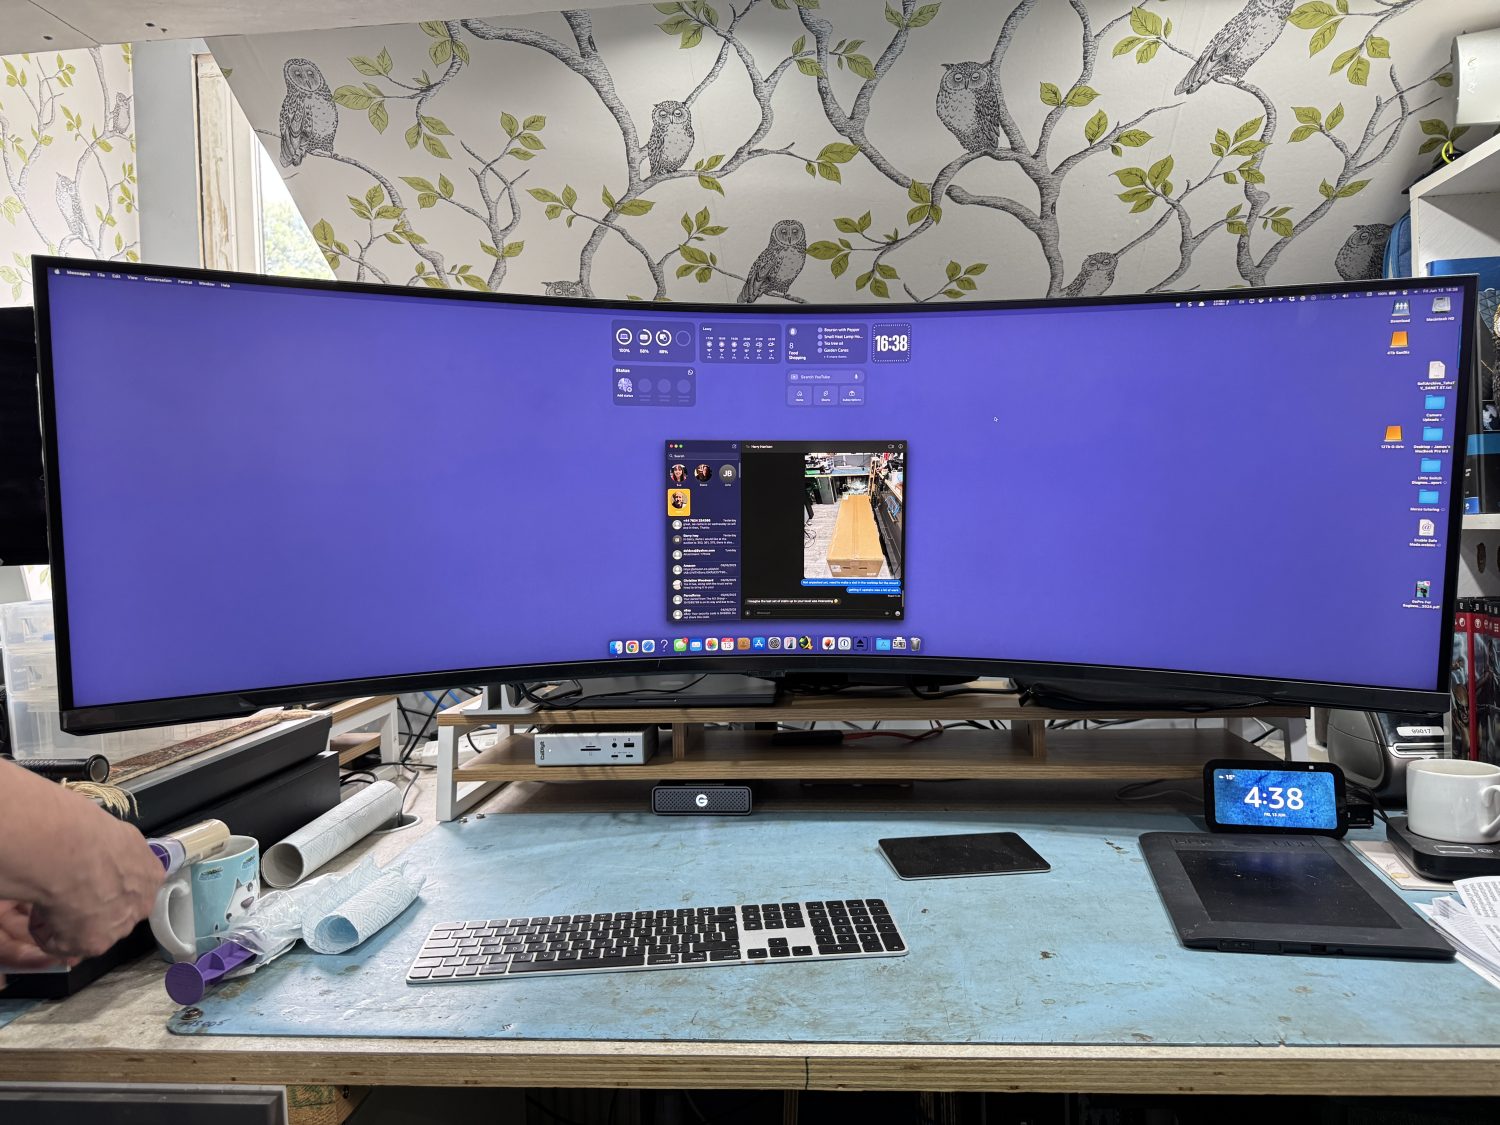
So I bit the bullet and ordered the Samsung Display, I now had the added problem of finding a ARM that would be able to hold this display, thankfully there is just one at present that can hold such a display, the Secretlab MAGNUS Monitor Arm (Heavy Duty Edition), this would cost me £300 on-top of the £1899 for the Monitor, all I can say at this point is a BIG Thanks to the ‘Bank of Sue’.
Secretlab MAGNUS Heavy Duty Monitor Arm
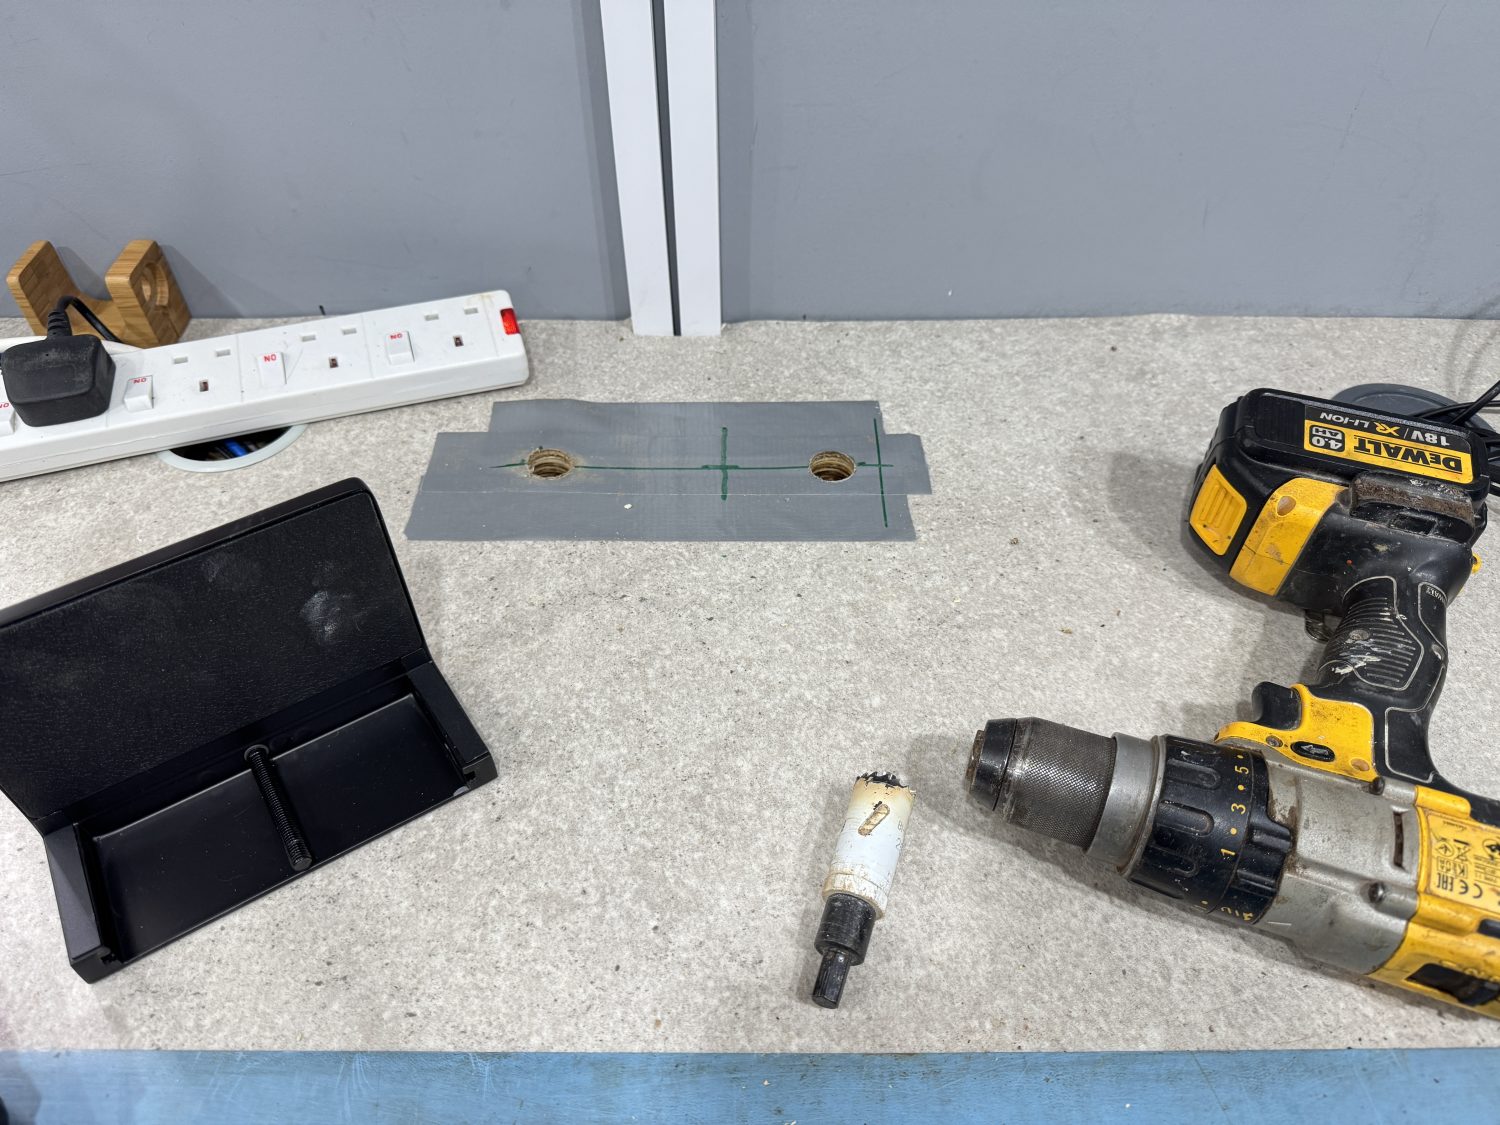
Not too long after ordering was there two large boxes delivered to the house, I waited until I had a bit of help to work out where I was going to put the monitor, once this was decided I then had to work out how I was going to mount the Secretlab MAGNUS Monitor Arm, but even then I needed to double check the space required behind the Arm and then on top of this was the obvious centre of the display, maybe I was being way too cautious but this took me a day of messing out, changing my mind before I was finally happy to drill two holes and attack it with a Jigsaw, this allowed me to be able to mount the bracket that holds the arm to the desk, on a Normal desk which you can get to the edges of the desk you would obviously not need to go through the hassle that I have had to as you can just clamp the monitor arm mount onto the edge of the desk, but in my case I would need to make a slot to be able to take apart the mounting and fit it into the slot and then re-attach the part that clamps the mount to a desk, with all this done, the rest would follow suite.
I Marked out where I wanted to fit the Secretlab MAGNUS Heavy Duty Monitor Arm with the help of some Tape and a Sharpie.
I spent ages measuring the monitor, halving that, and then measuring again, it’s a little deceptive trying to work out what space the arm needs, what space it needs behind the arm and also to make sure that I will get enough space to move the monitor out of the way if I need to get behind it, once I had worked out where I would like it I needed to make sure that I would not be cutting through any strengthening bars under the worktop, this meant that I would have to move the mounting slot slightly to the left by about 2”, at this point I was just hoping that this would not affect the mounting too much. I bit the bullet and drilled the two holes through the desk, quickly checking underneath to make sure that I had not hit anything. With the two holes drilled out I then took my jigsaw to the worktop to make the slot that I needed.
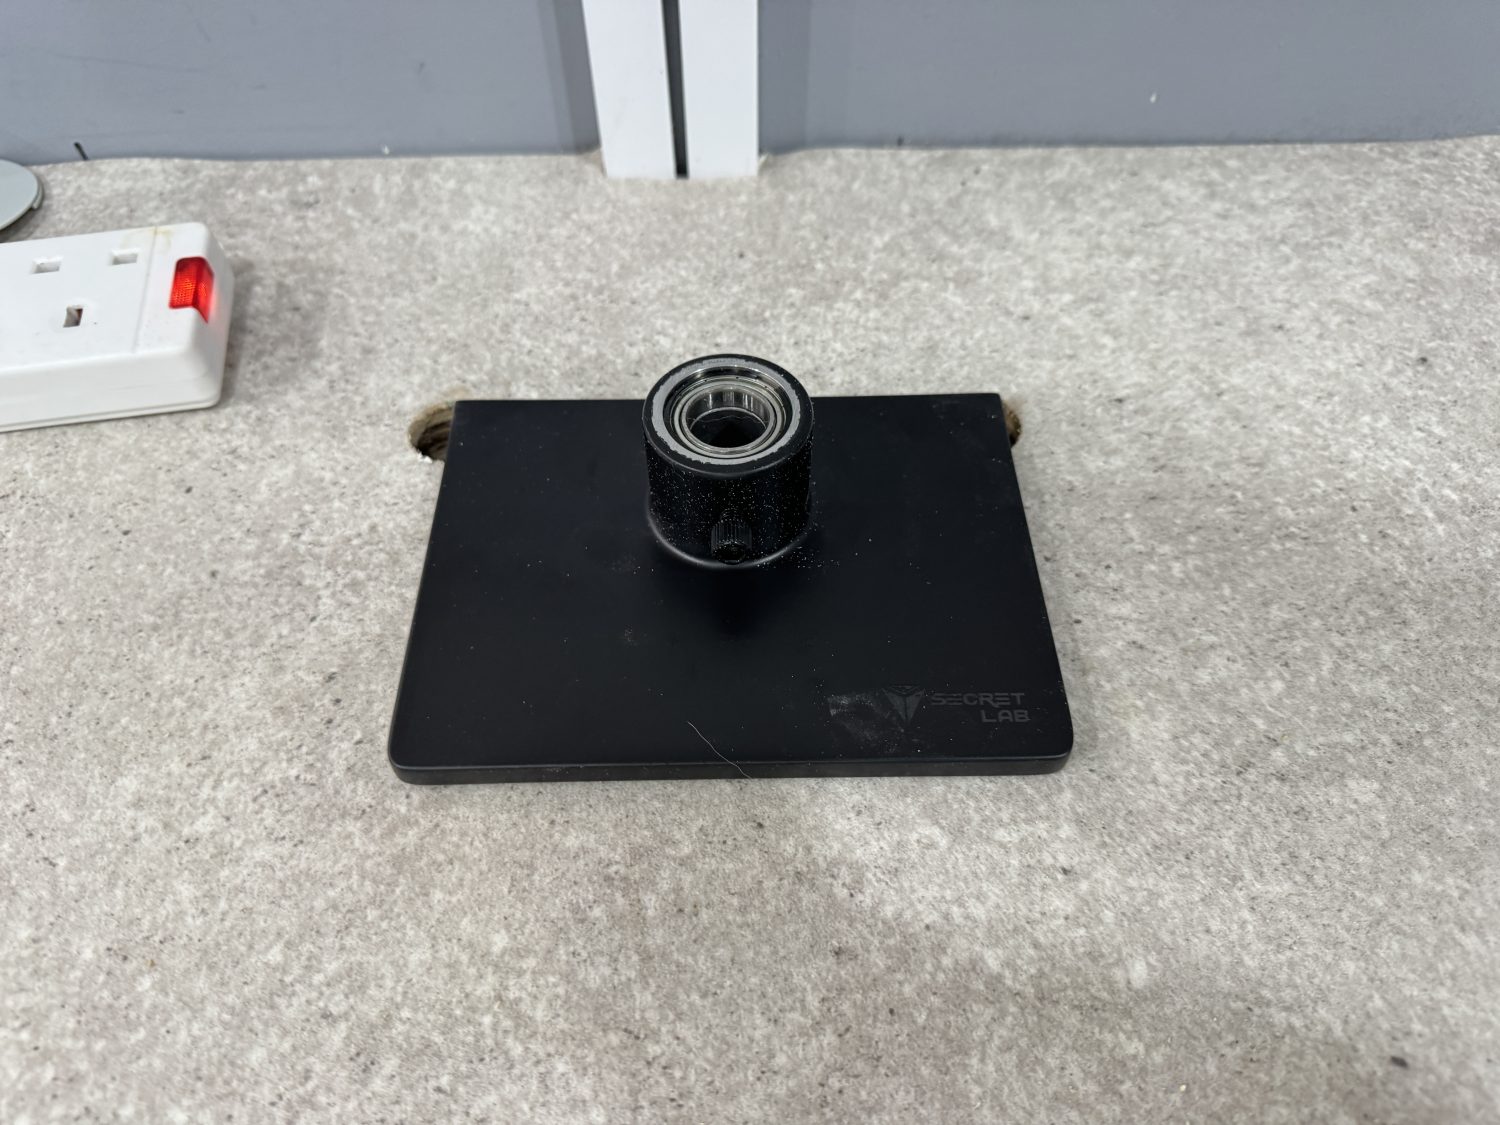
After cutting out the remaining wood, I just dropped in the base plate for the
I used a small hole saw to start making the slot for the Secretlab MAGNUS Heavy Duty Monitor Arm.
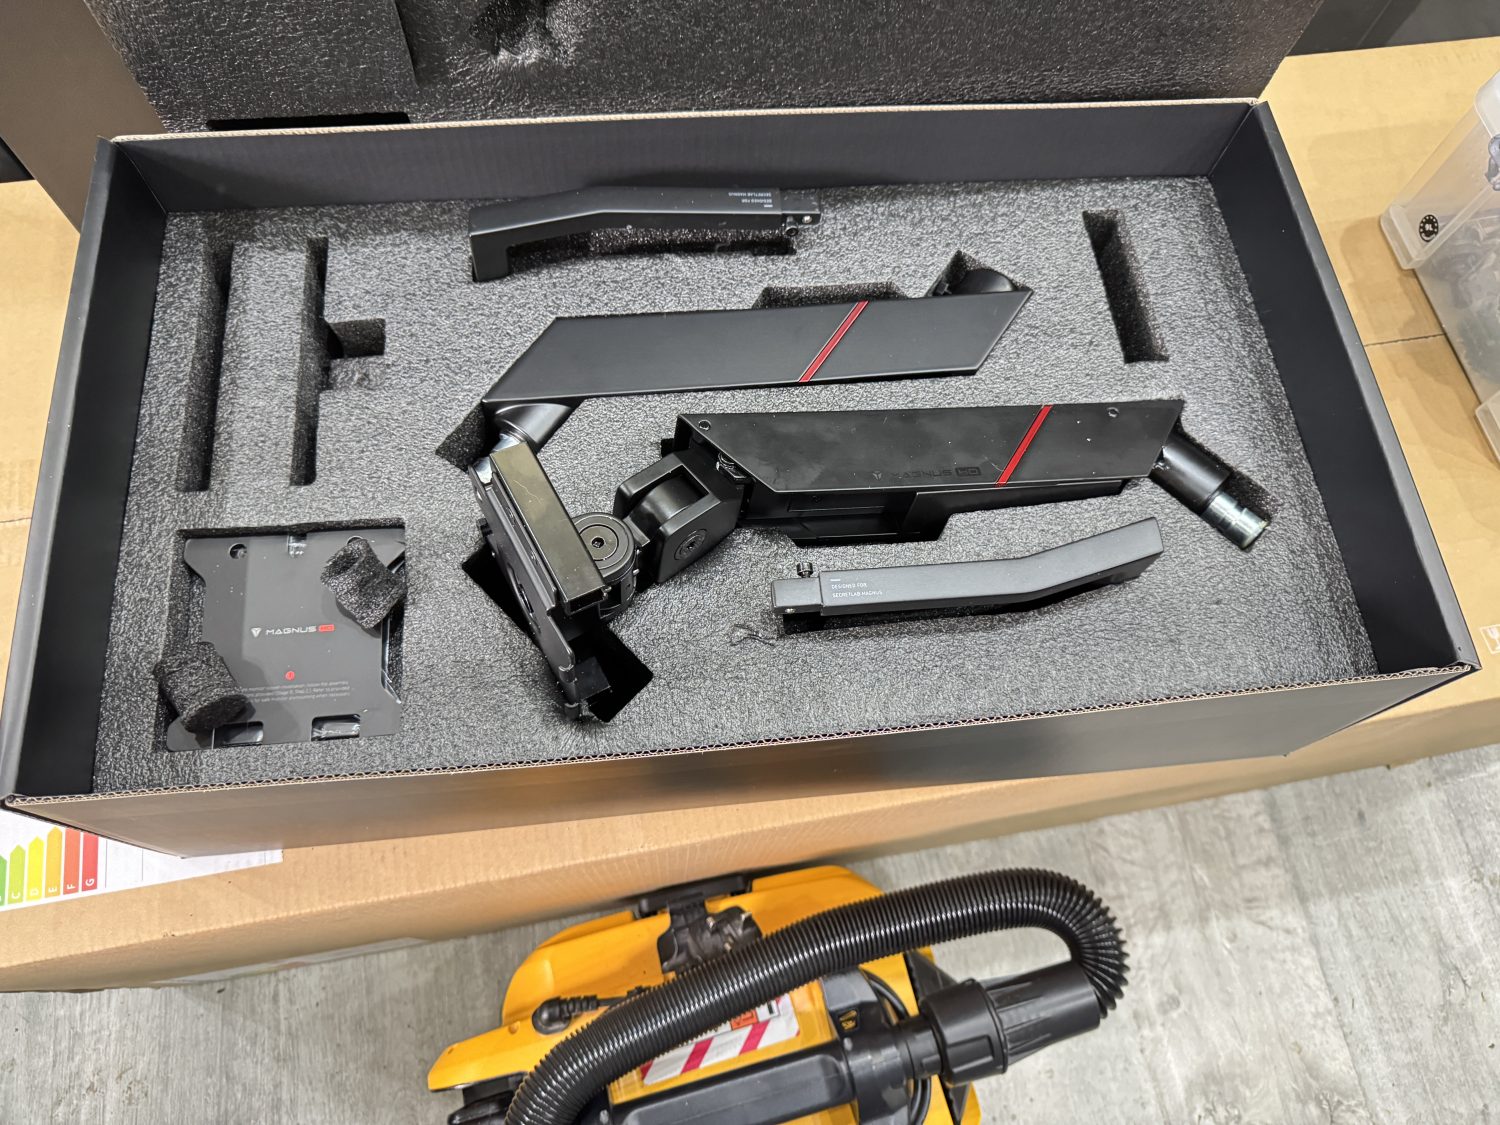
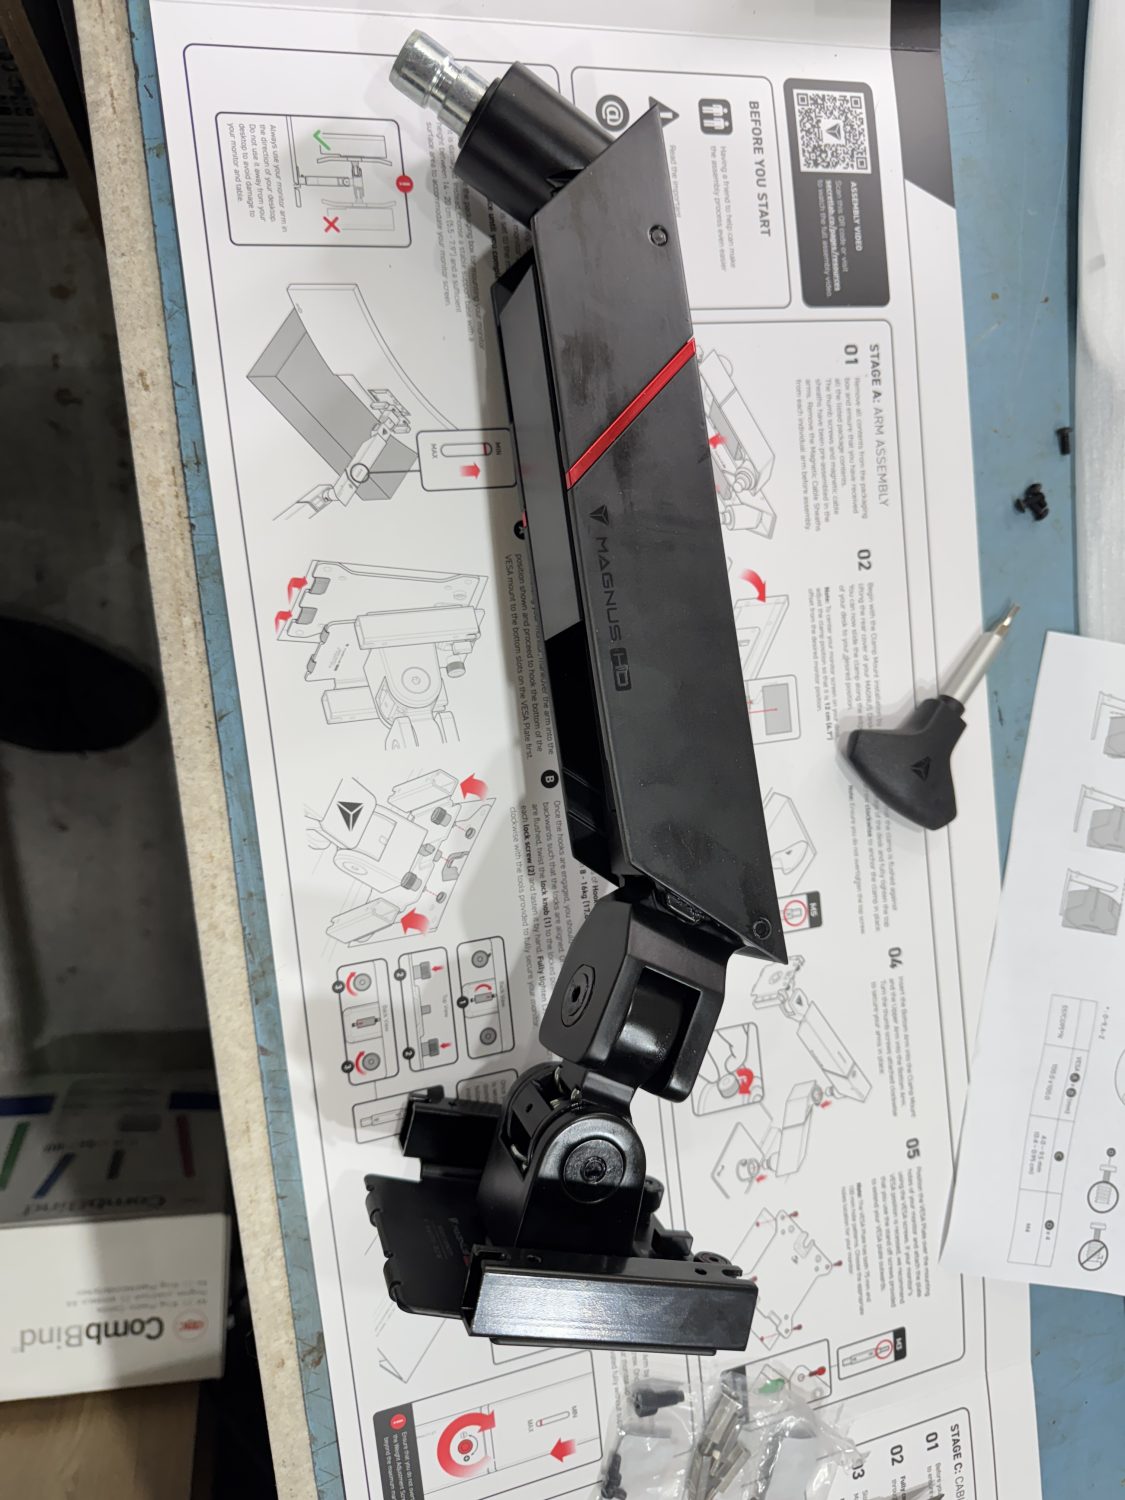
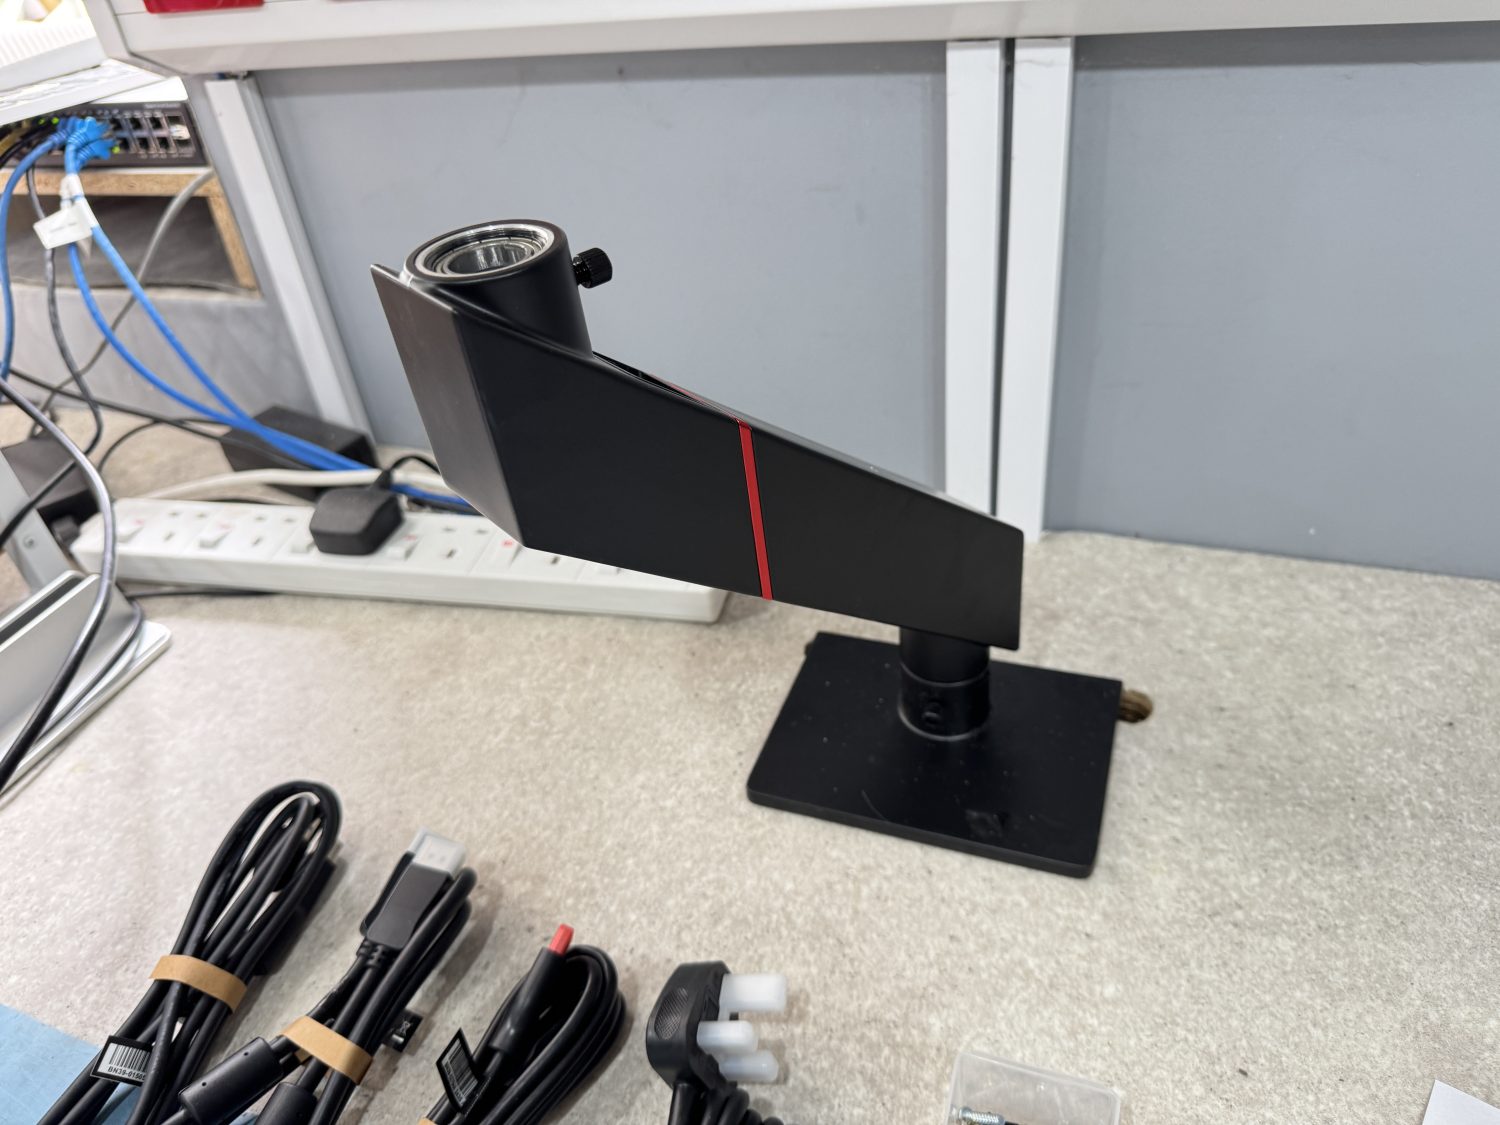
The parts of the Secretlab MAGNUS Monitor Arm are well packaged and comparing them to the smaller dual monitor arms that I got from Amazon UK, you see a completely different level of quality, these are much bigger, and a lot of thought has gone into the mount, especially where the mount meets the monitor.
Each part is really well packaged, which is a sign of quality.
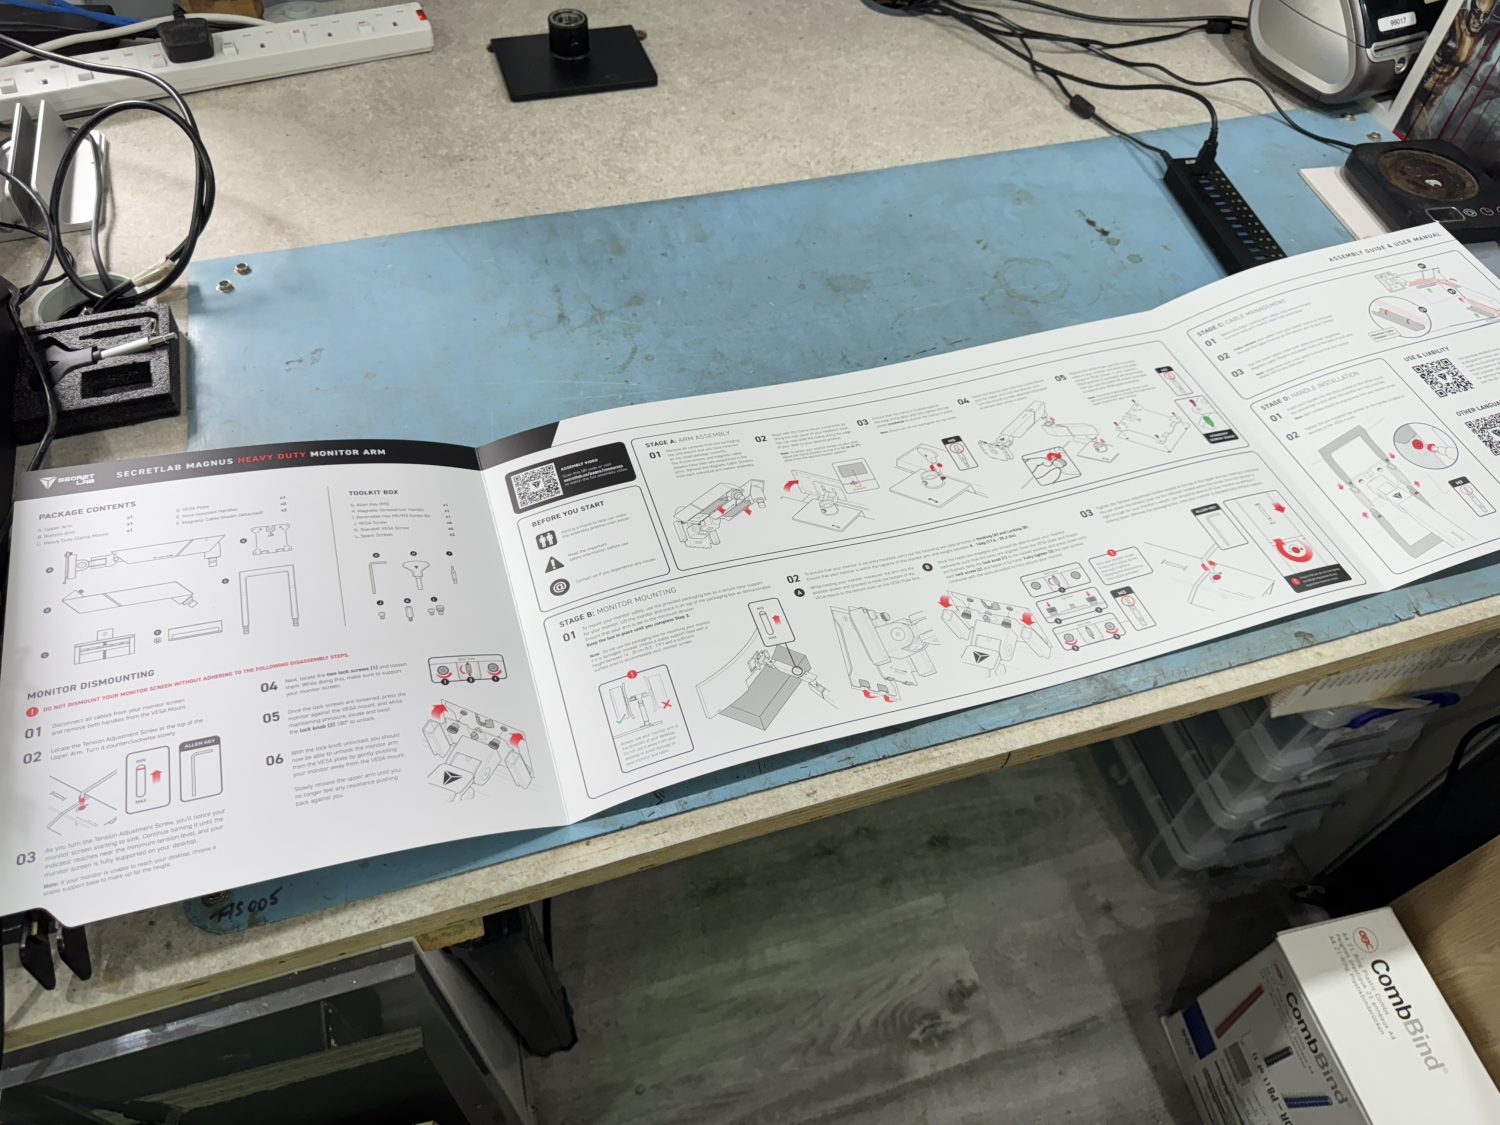
The Instructions for the Secretlab MAGNUS Heavy Duty Monitor Arm are very well laid out and easy to follow.
The assembly of the Arm is very straight forward, and just trying to pull the arm down took a lot of weight, and I noticed that I had not even adjusted the tension yet and even on its weakest settings you get the feel that this could handle much larger monitors than the one that I was going to install.
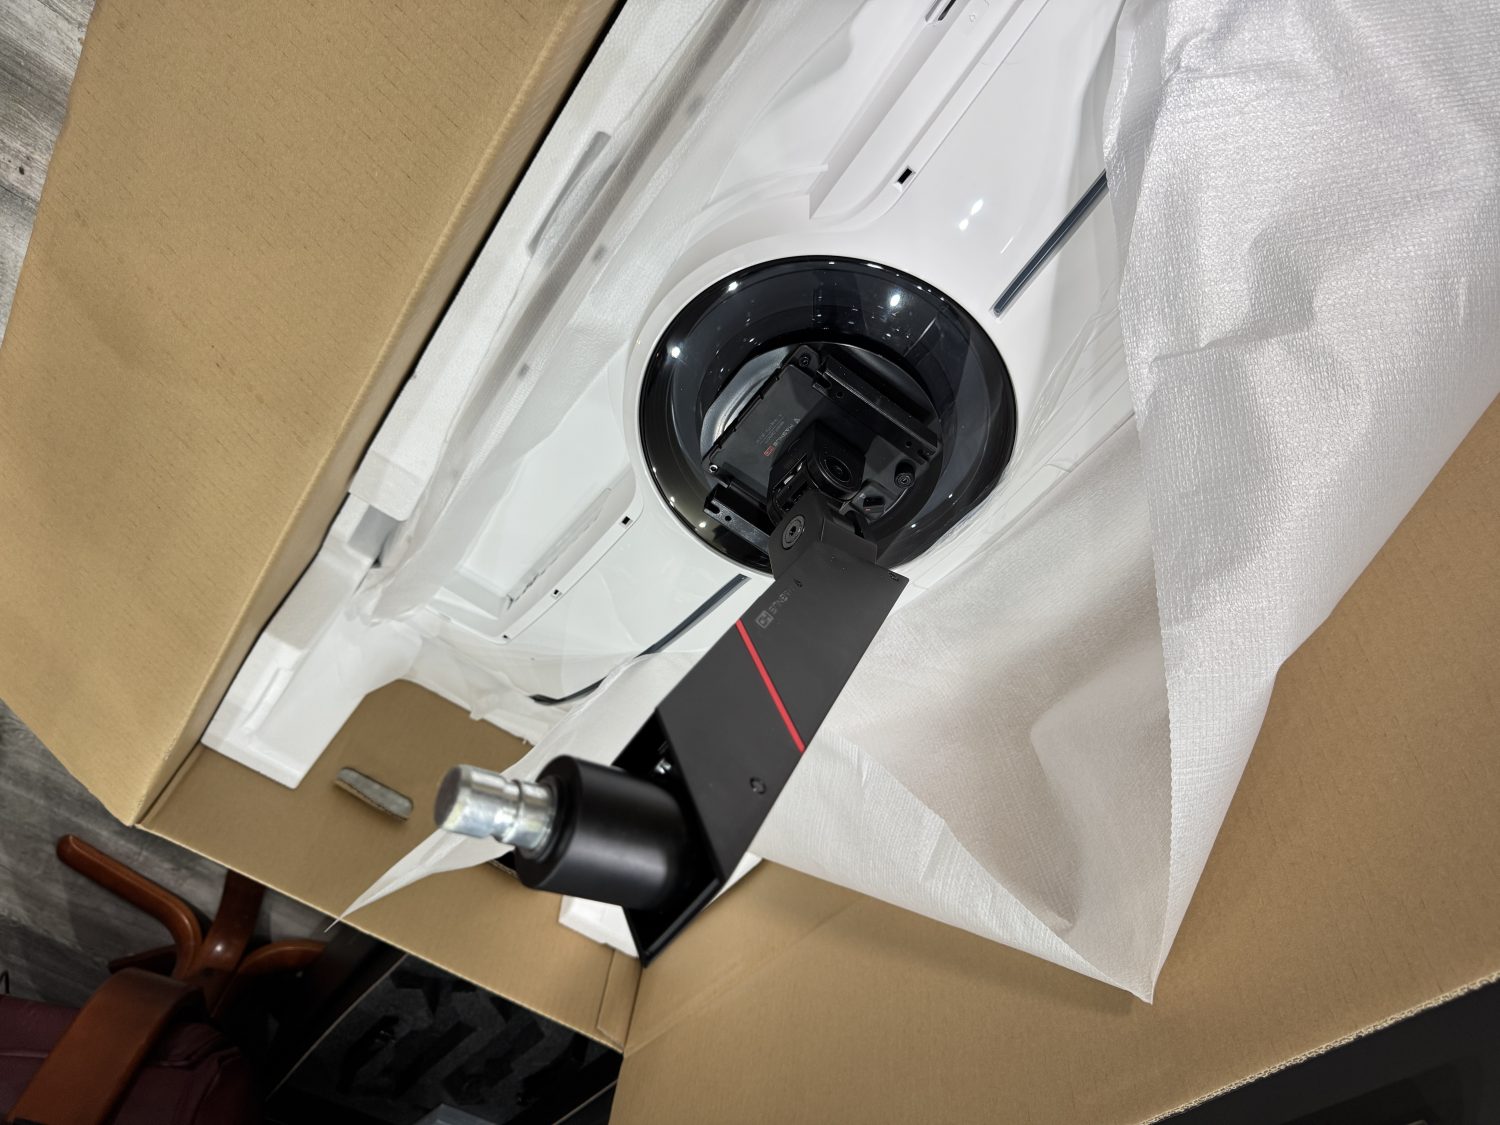
At this point I did a major cleanup, I removed anything around the worktop that might come into contact with the monitor once it was installed on to the arm, took away anything that I would trip over and a lot of the tools that I would not need, once this was done I took a knife to the box and opened it so I can see what I have to deal with.
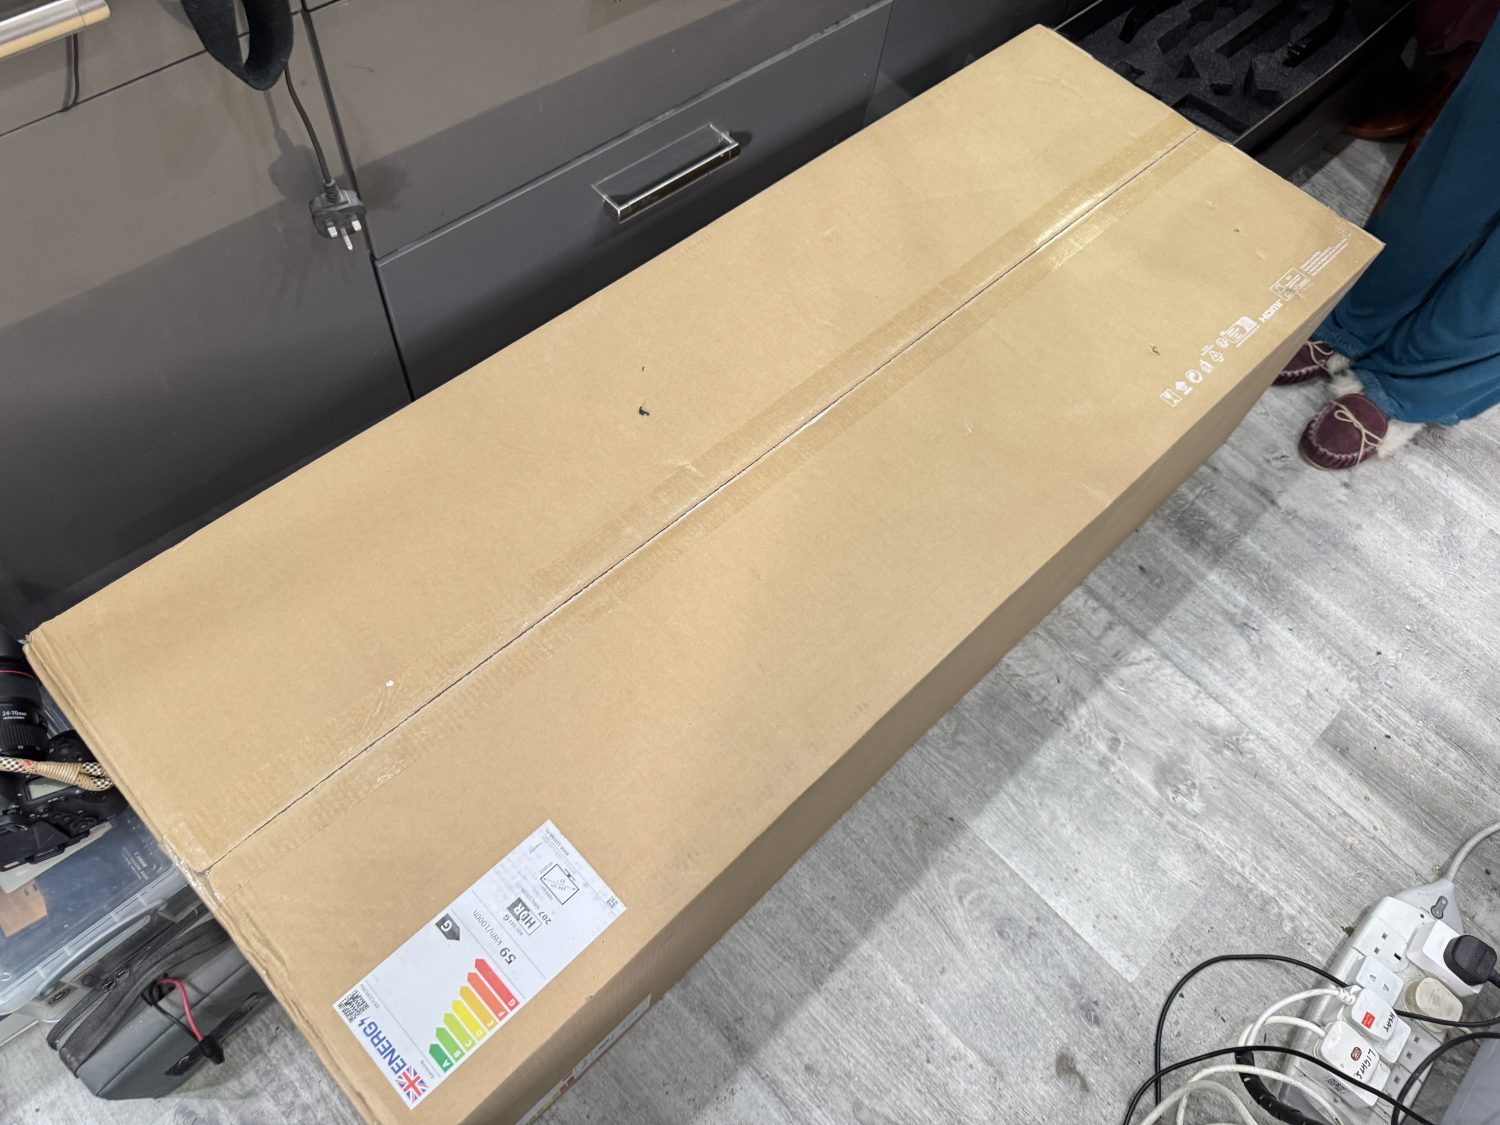
Now for the Big Box that holds the Samsung 57" G95NC Odyssey Neo G9 240Hz Dual UHD Monitor
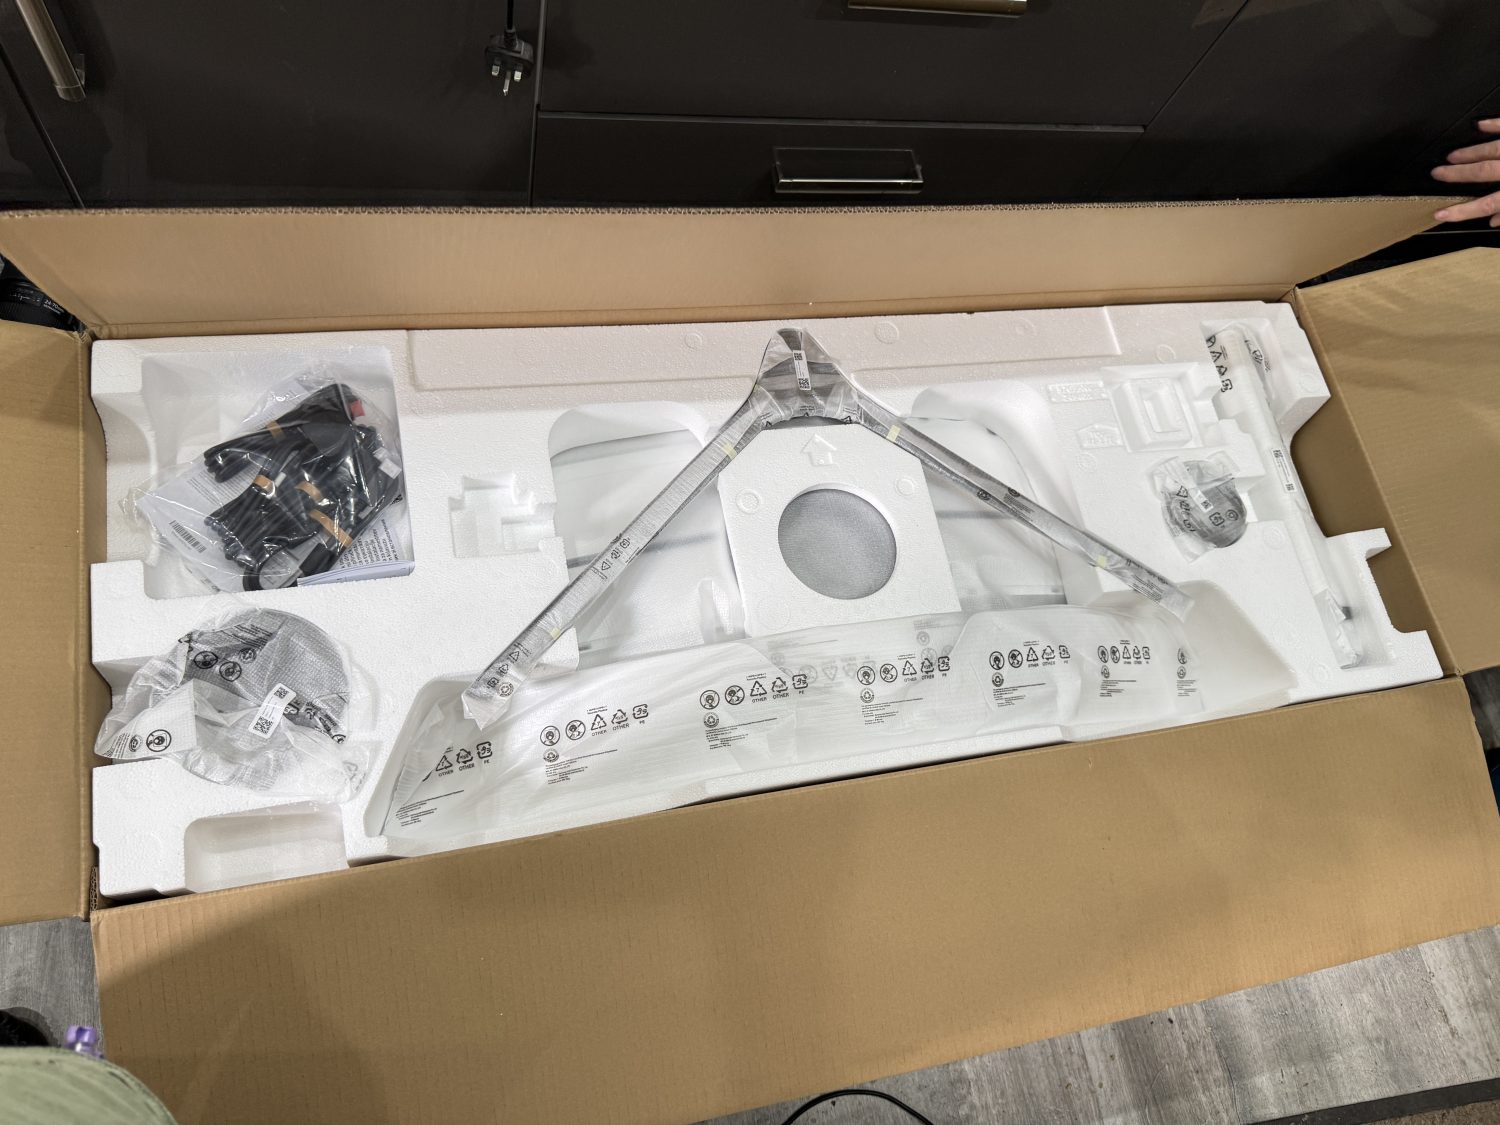
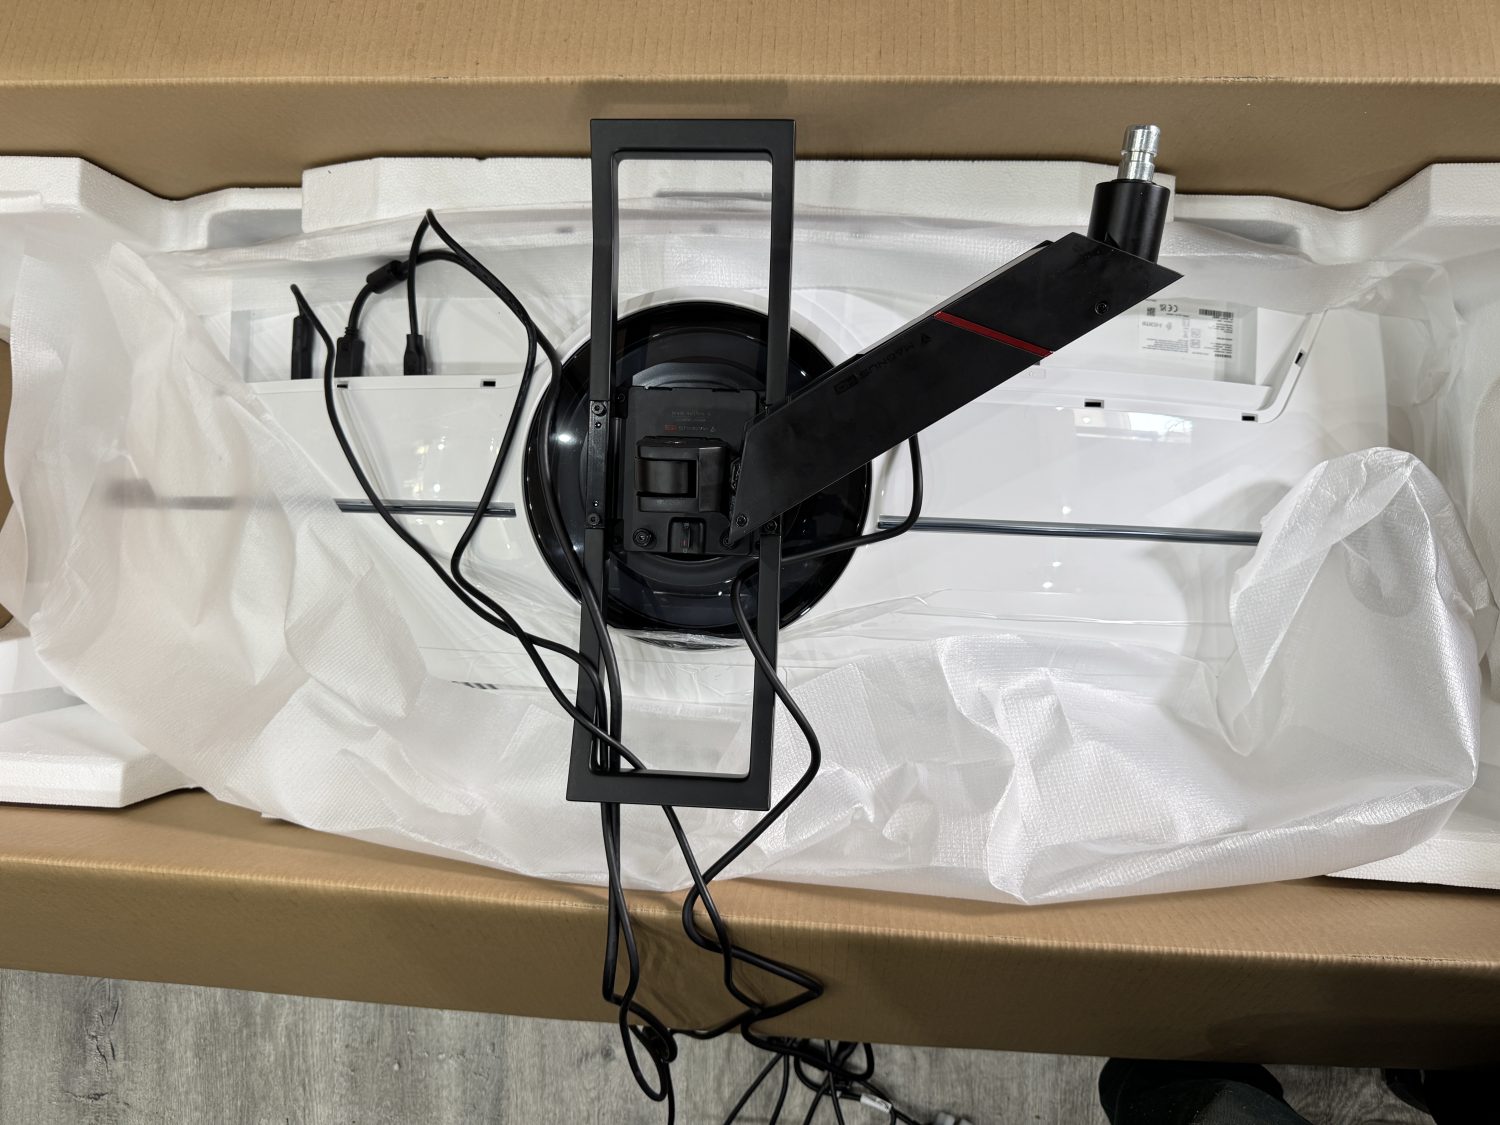
The contents of the box that holds the Samsung 57" G95NC Odyssey Neo G9 240Hz Dual UHD Monitor
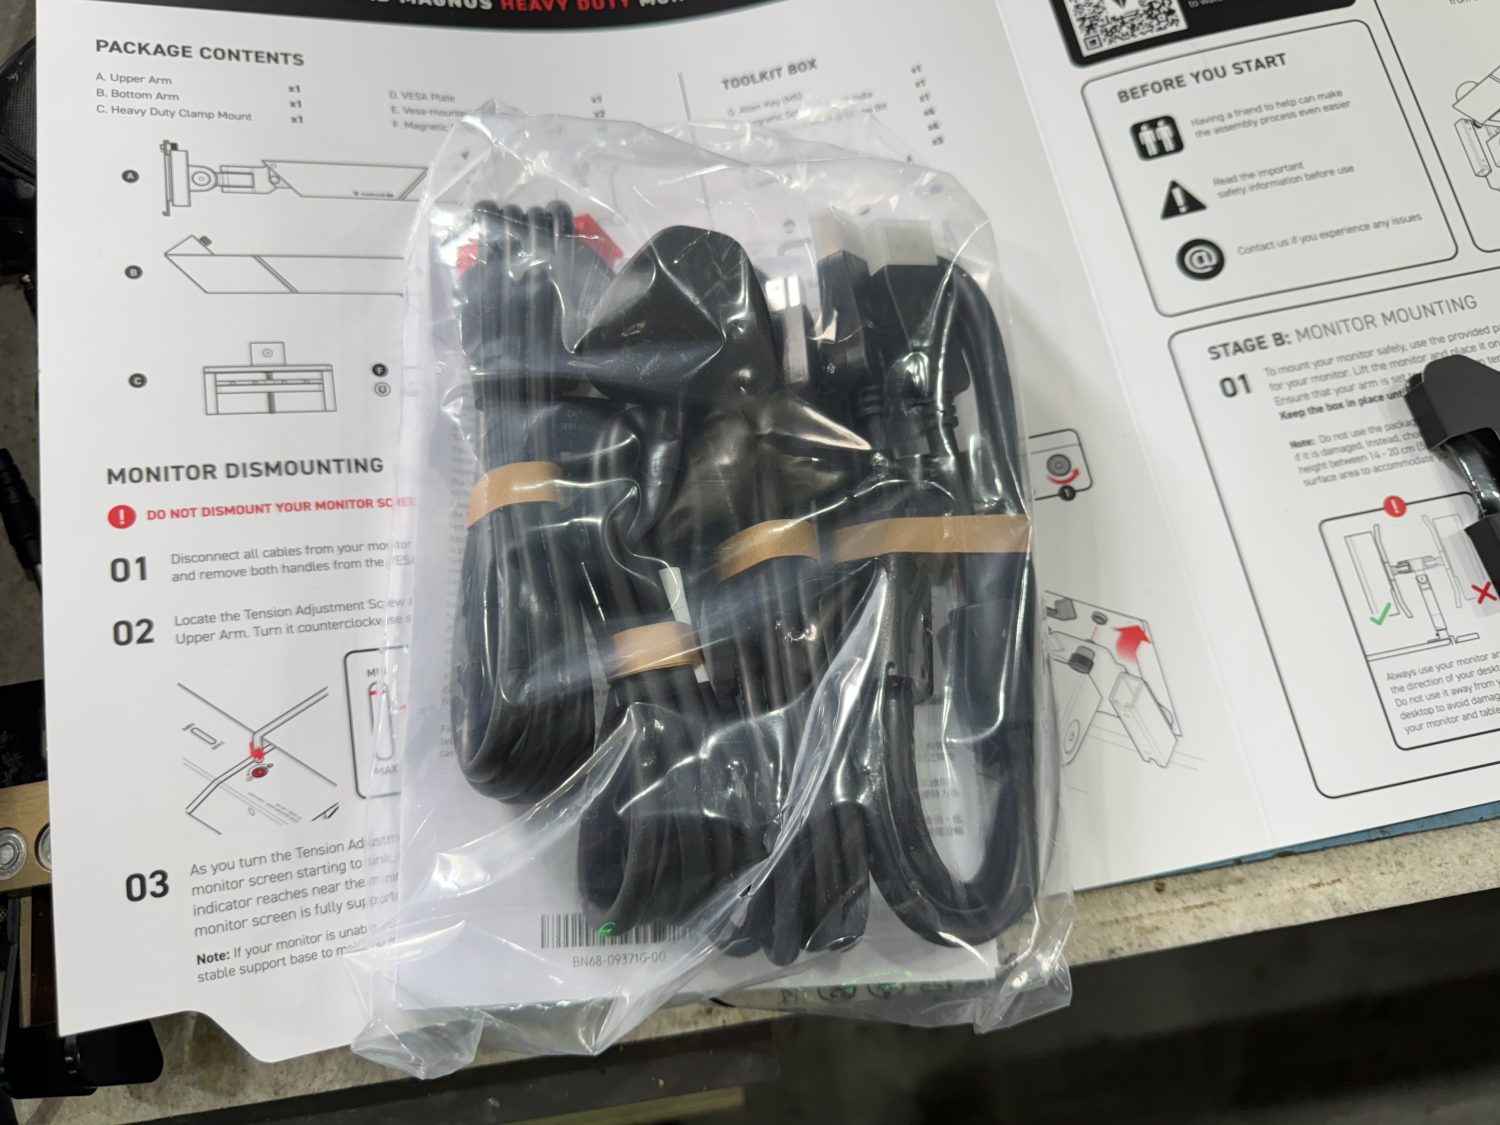
With the box open, you are greeted with some nicely packaged items, There is the obvious parts for the Monitor Stand that I was not going to use, the legs of which are Hugh and although I would not loose much space on the worktop and it would most probably fit underneath of my small shelf unit that I like to use, I am happy that I will not need to use these parts, just to let anyone know, the stand is very sturdy and solid and has quite a bit of weight to it, but I have an arm so I will not need those parts. So the first useful item removed was the ‘Cable Pack’, The cables themselves are of a good quality, but they are also quite short, in my case they all fitted and does not cause any issues with the lack of movement when installed onto the Arm, but I choose not to try to hide the cables in the Arms cable management as they would be a tad on the short-side and would not reach my CalDigit TS-4 Hub that I use with the MacBook Pro.
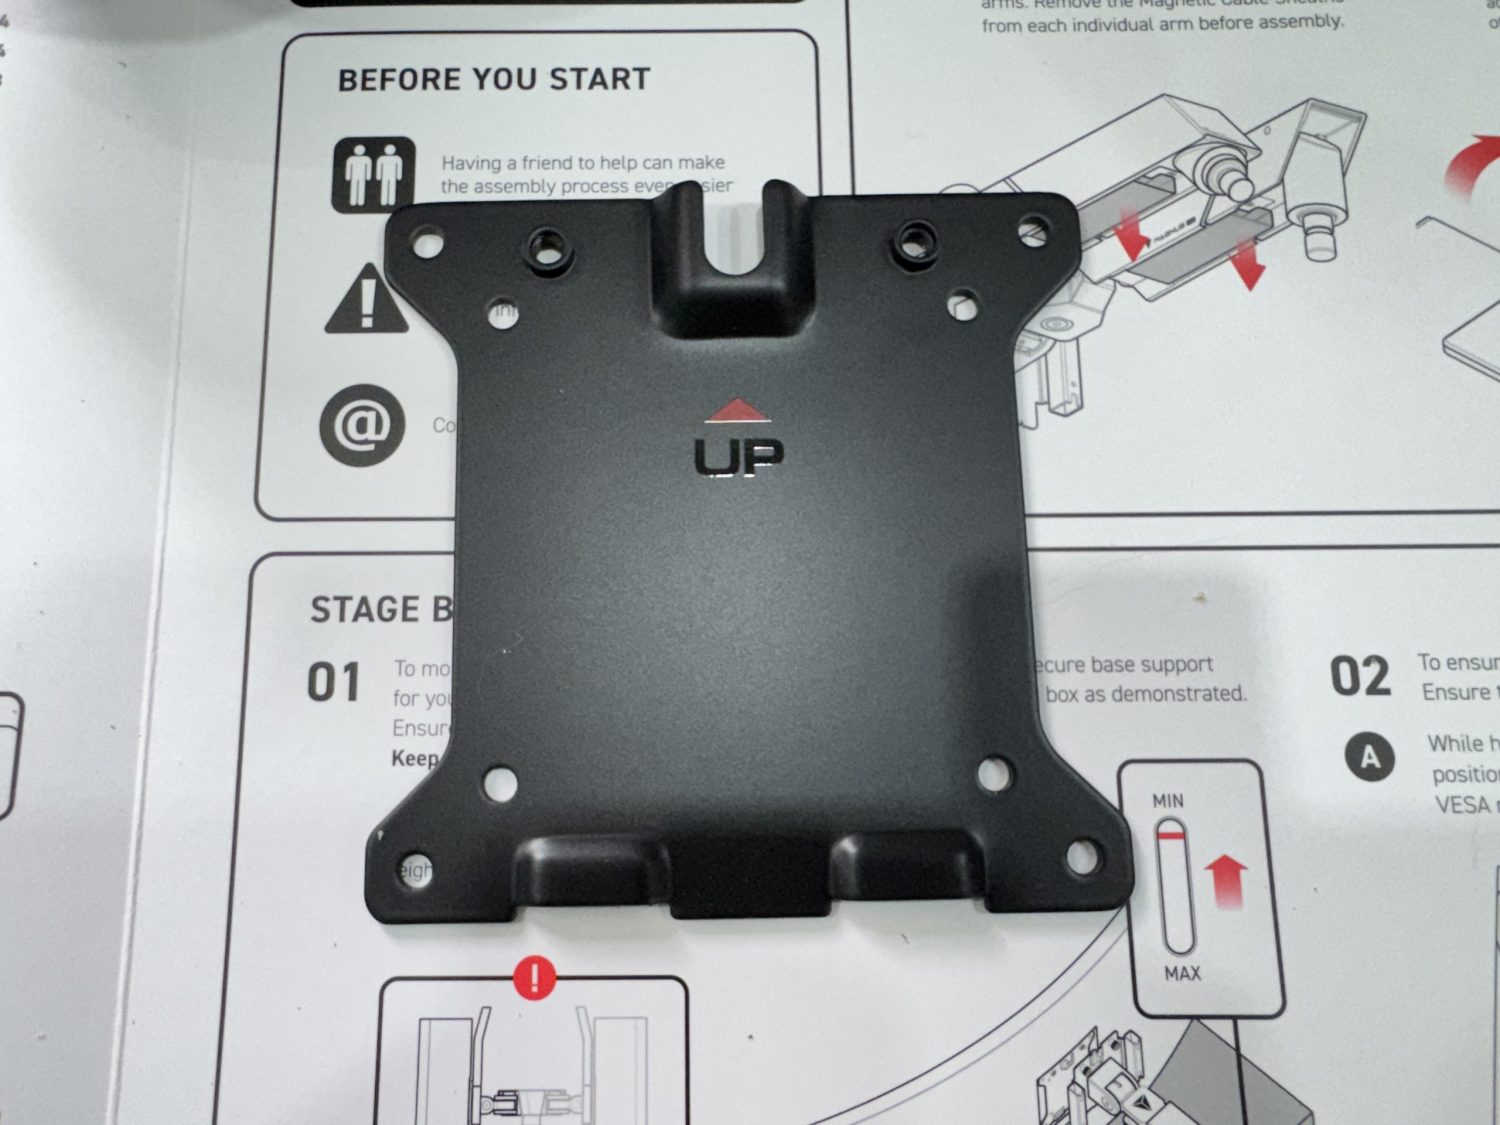
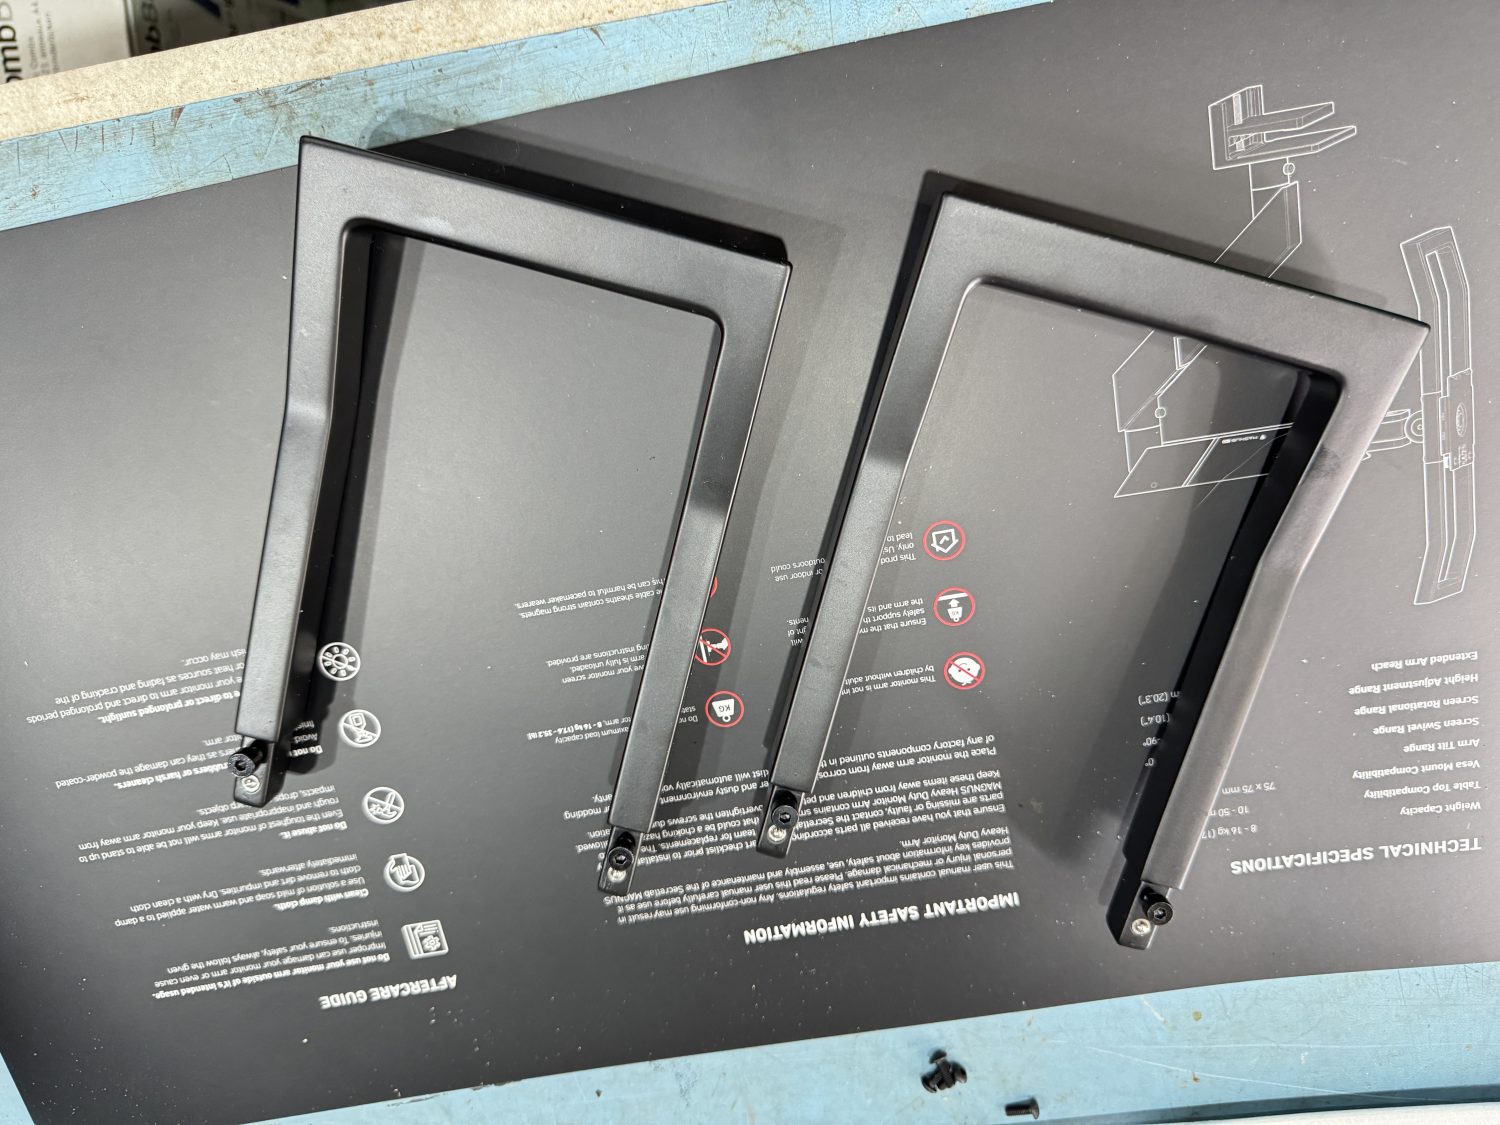
A nice touch with the Arm is the quick release plate, this should allow a one-person install, but due to me not being on top form and pretty much week, I would enlist the help of two others when I finally get to install the monitor on the arm.
This is the 'Quick Release Plate' supplied with the Secretlab MAGNUS Monitor Arm (Heavy Duty Edition)
At this point I should mention that even now after installing the monitor I still have not found a pack of 4mm x 10mm screws that are needed to install the base plate to the back of the monitor and also tom attach the quick release plate, Thankfully there are a few spares suppled with the Arm, and I also have loads of this size screws in my racks in the workshop, so at least I was covered. They must be taped into the packaging somewhere but I never did find them.
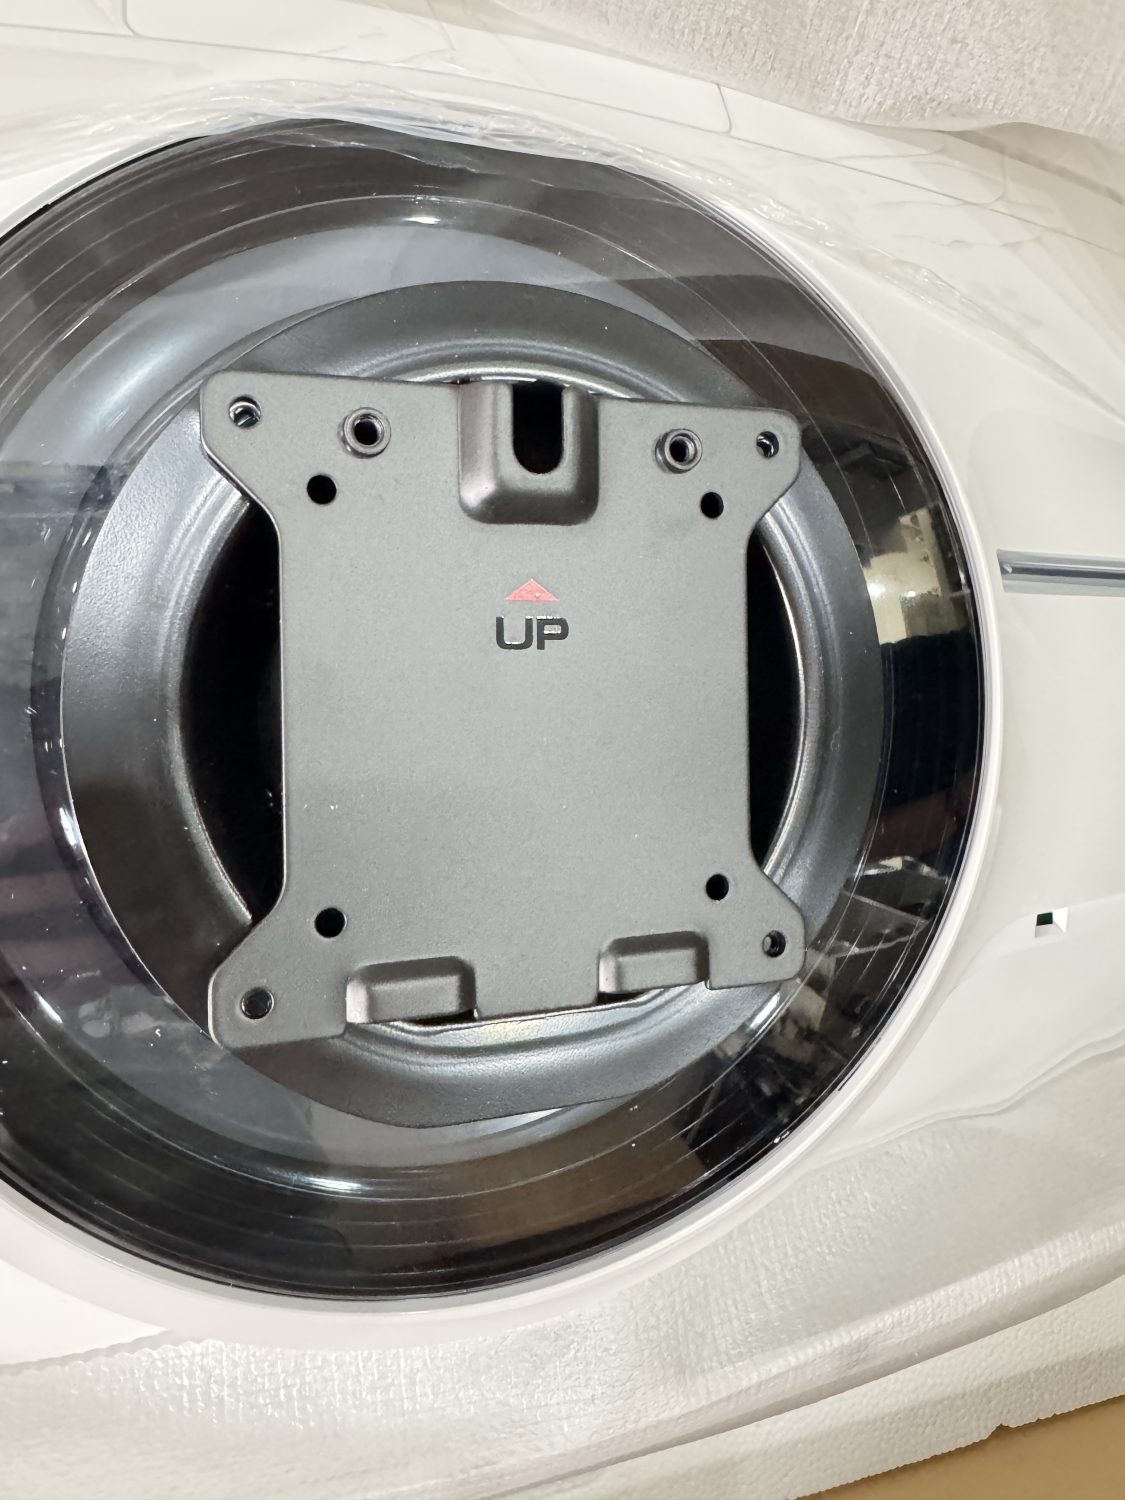
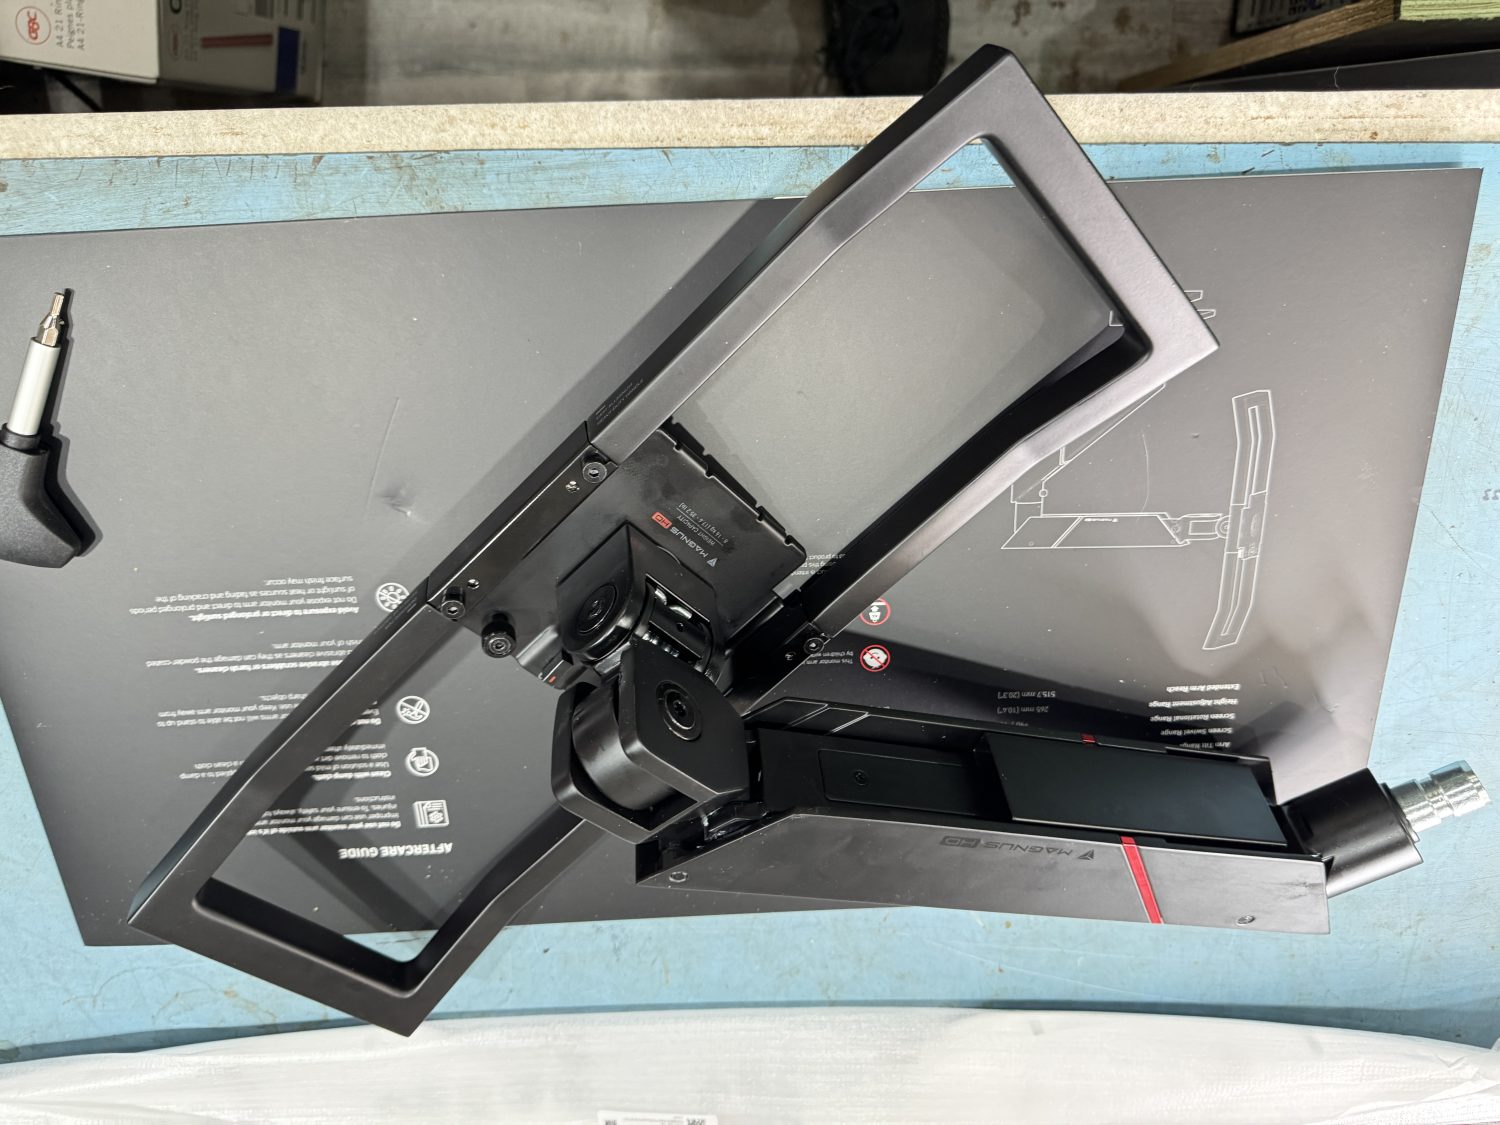
This shows how the quick release plate will finally attach to the rear of the monitor.
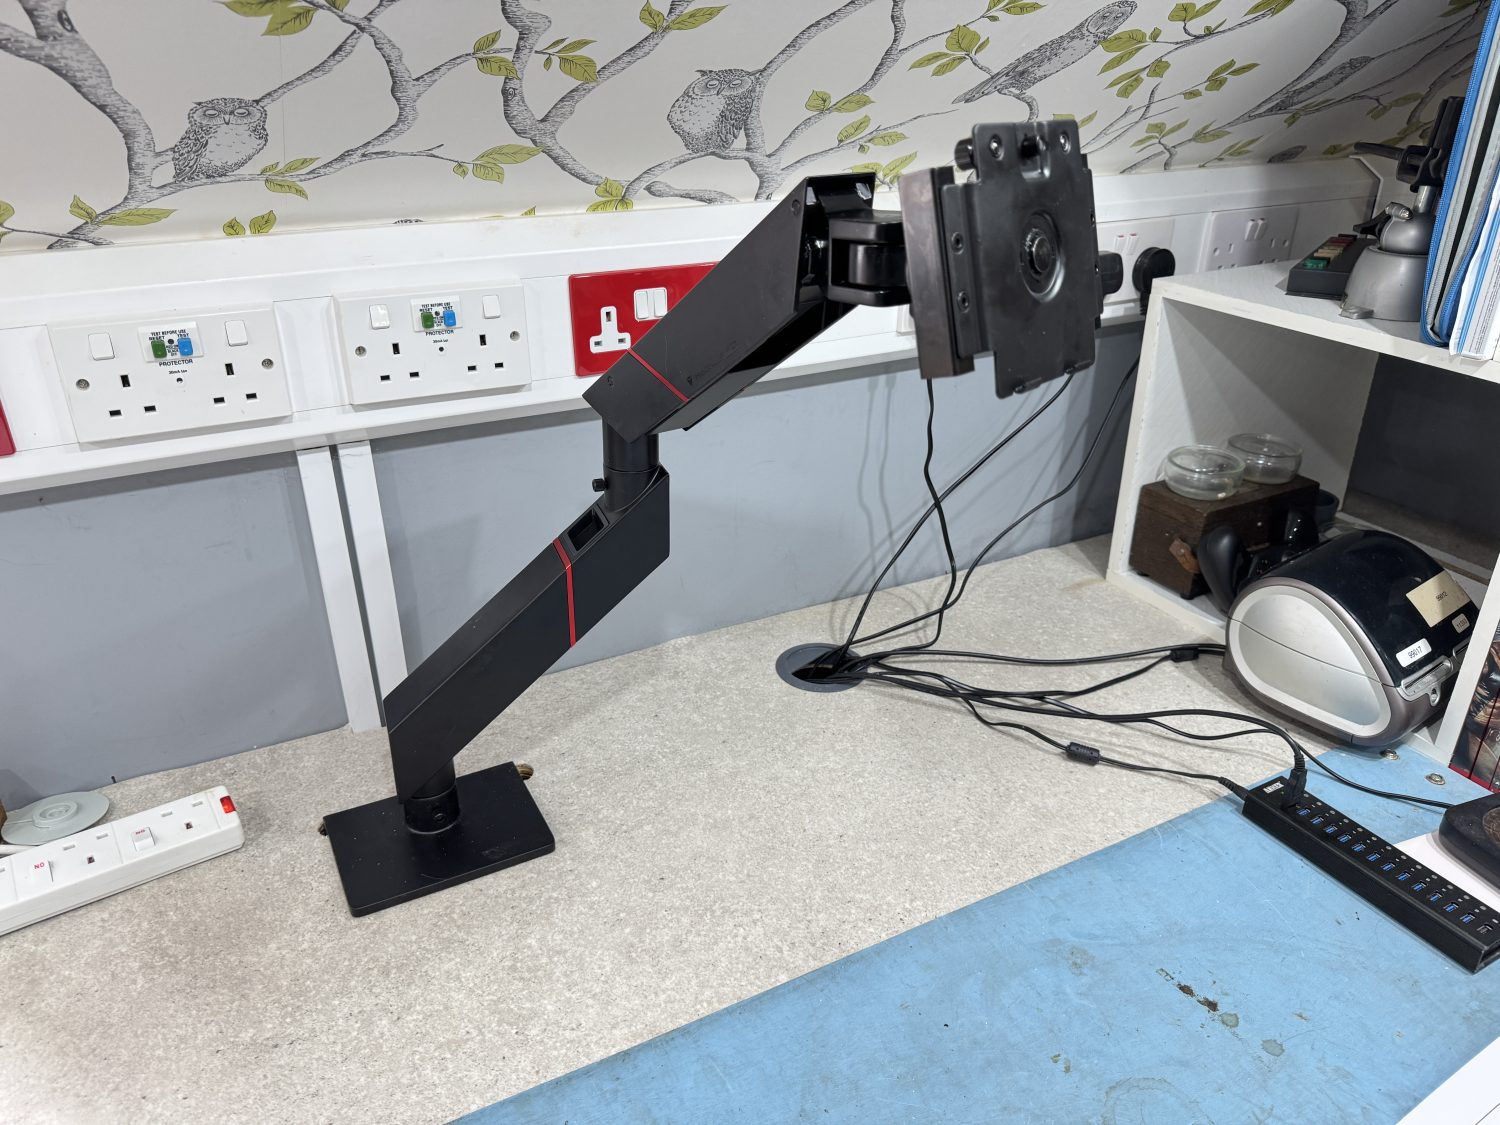
The photo below is showing the top section of the arm and the quick release plate installed.
The top section of the Arm is removed as this needs to be fitted onto the monitor first.
Kind of no turning back now, it is recommended that this is the way to extract the monitor from its packaging, the only different here is that I am using a arm to hold the monitor up instead of the normal stand that is supplied with the Samsung display. The idea here is that I will be able to extract the monitor from the box and packaging, then Sue and Gerry will be able to grab each end of the monitor so that it can be rotated up to the correct way and then they can bring it over to the bottom of the arm and I will hopefully be able to mate up both parts.
The Top section of the arm, complete with the quick release plate is installed to the back of the monitor, this will help to life the monitor out of the box.
The base section of the Secretlab MAGNUS Monitor Arm assembled and waiting for the top section.
These parts are used to aid the movement and adjustment of the display without putting pressure on the display itself.
These handles that fit into the back of the head unit took a bit more heavy handedness than expected, they are a very tight fit, there are small recessed ball bearings in the end of the handles, but if you have a rubber hammer handy then this should just snap into place, once fitted there is a screw in each of the ends that make sure that they will never release at a later date.
Mounting these handles into the back of the Monitor Mount was harder than I expected
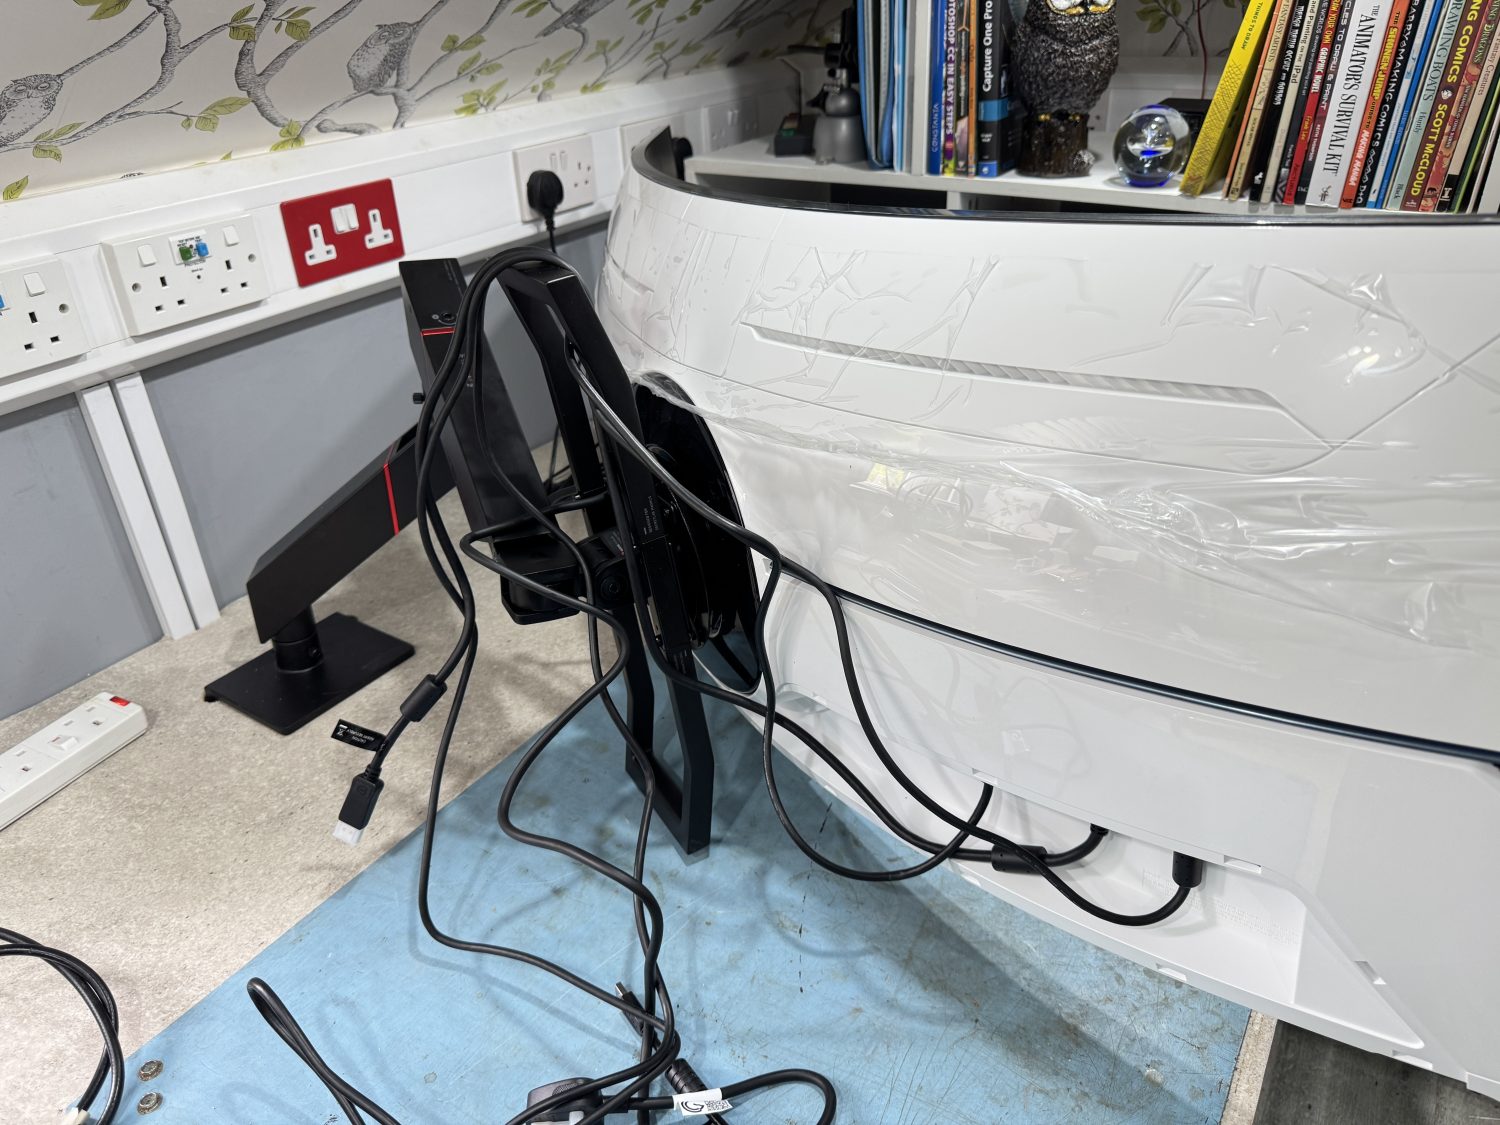
Everything now fitted to the back of the Samsung monitor including some of the cables, ready to be man-handled.
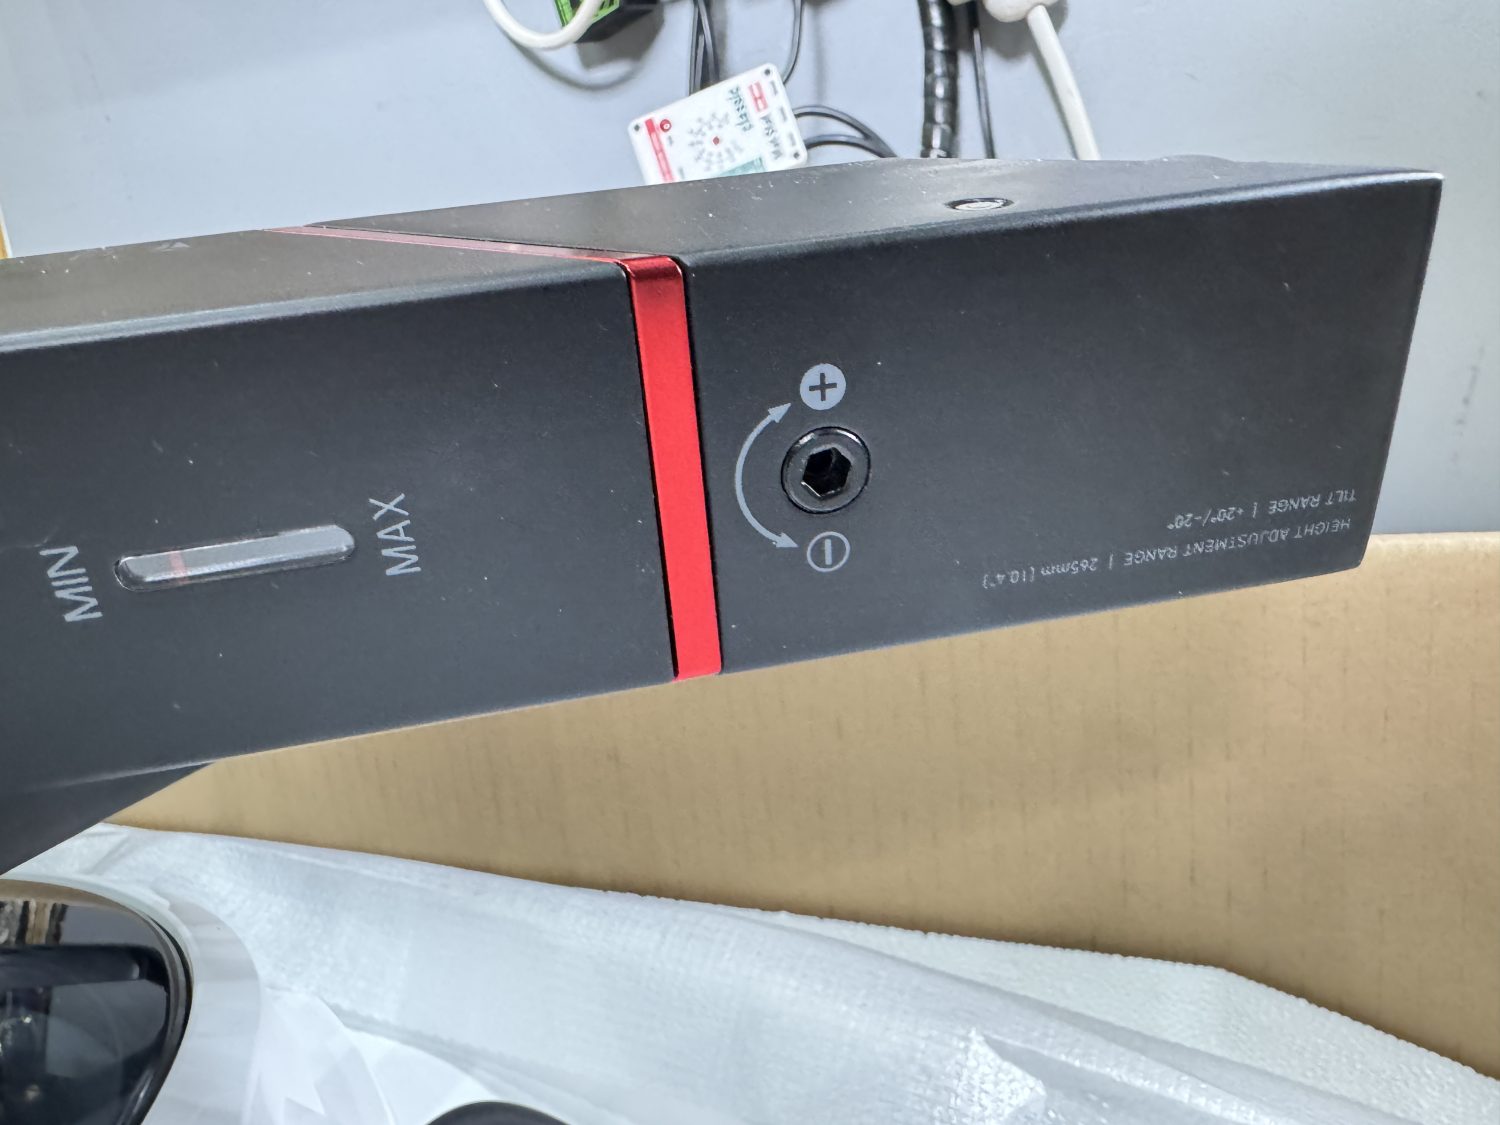
On the top section of the Arm you get to see where you can adjust the tension of the mount, I found that I had to turn this all the way up to give the best support for this heavy monitor.
Lifted on the the base section and nearly ready to use...
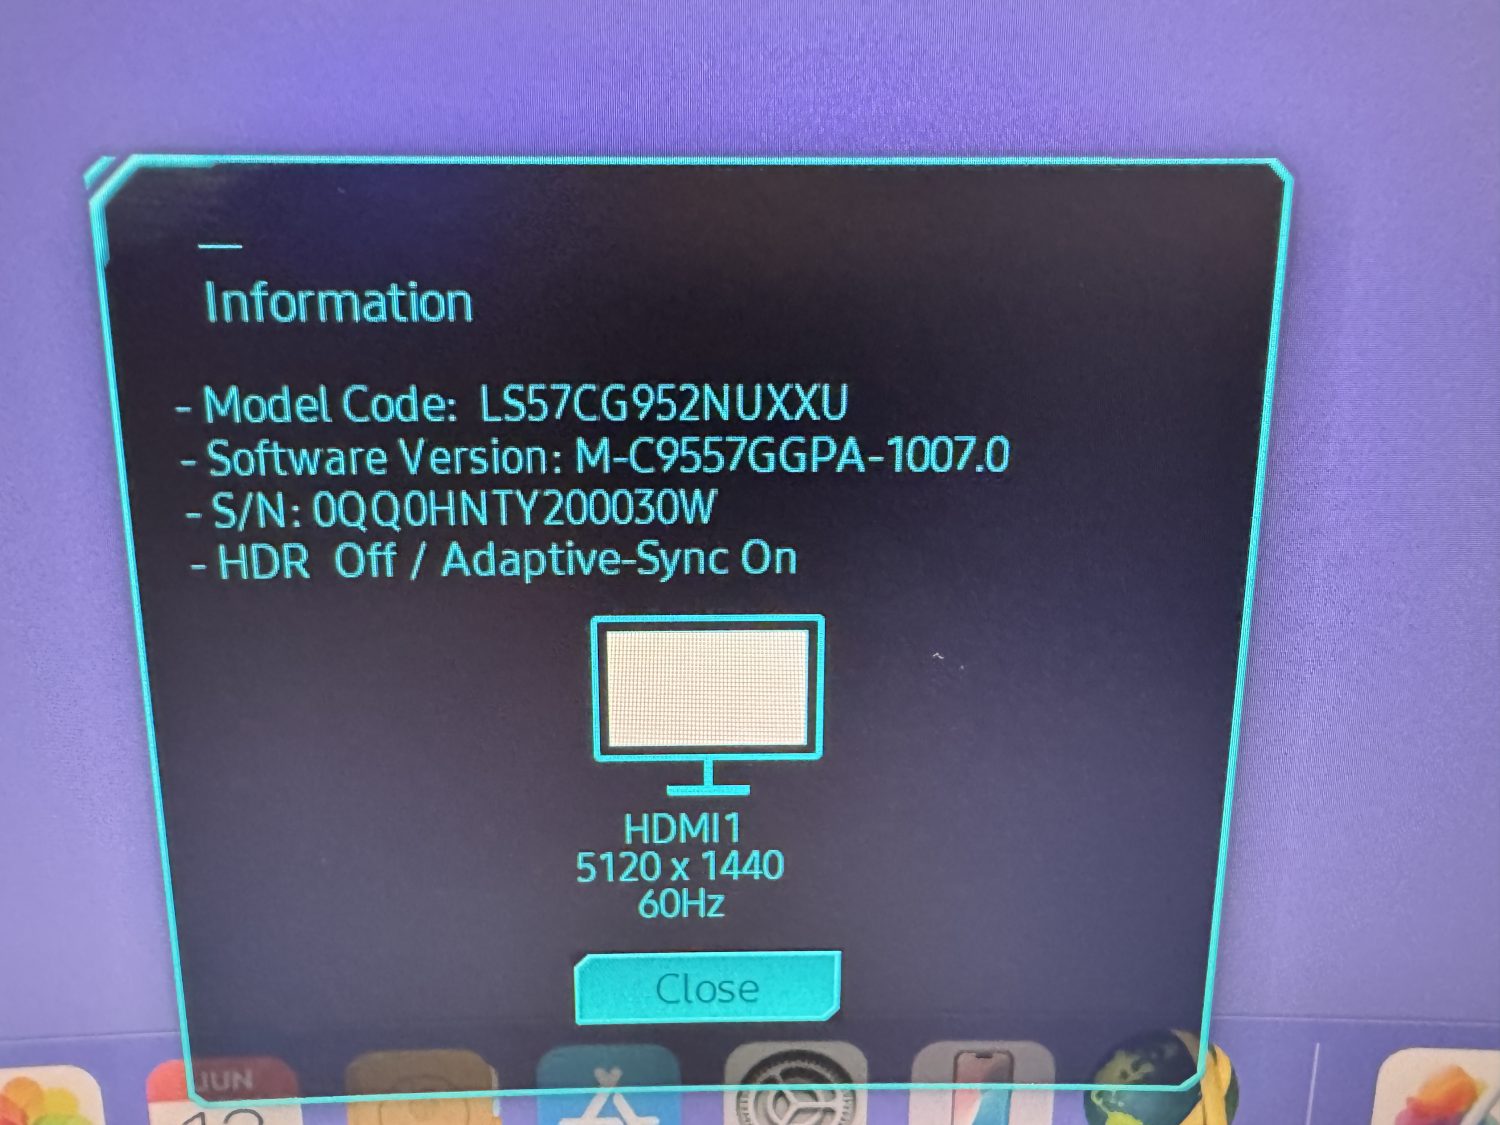
The Information Screen on the Samsung 57" G95NC Odyssey Neo G9 240Hz Dual UHD Monitor
This displays the one big problem that I have found with this monitor. After watching loads of YouTube videos on this that show loads of people using the display with both Windows and Mac systems, I have not found any that say they had a problem getting a resolution of 7680 x 2160 and at 120Hz (at least), this is not a deal breaker as the resolution of 5120 x 1440 is OK, I’m not going to play many games so the 60Hz is not a issue, but the mac should display a higher resolution, I have ordered some 16K HDMI and Display Port Cables as well as a set ending in USB-C for the Mac, I will also be visiting my local gadget shop to get a better video card for the PC just to see if the PC will display the resolution that I would like, so even though I wanted to use this monitor on the Mac I do have the option of moving the PC (with a new video card installed) to be used with this new monitor, and I can then use the Mac with the 3 x Iiyama 27” displays, it will not be my ideal solution, but it will have to do until I can order the Dell Ultra Sharp 40 Curved U4025QW Thunderbolt Hub Monitor, I am a bit gutted but not at all disappointment, it can be put to use with either system, at least on the Windows PC I can use it with DaVinci Resolve and Fusion, After Effects and Cinema 4D, Blender Houdini and Softimage|XSI, it just means that most of the Photo editing and graphics will be on the mac over multiple displays.
My final thoughts on this display. I need to check if there is a newer firmware version available, I have already installed ‘Better Display’ on the MacBook Pro M3 Max and although it states on many websites that it should display the full resolution of 7680 x 2160, so hopefully the firmware upgrade (if Available) will sort this minor issue out. If not, then I just need to fit a better video card into the PC to get this working (Fingers Crossed), yes it looks as though this upgrade is going to be costing me a lot more money, so if you have a Mac YouTube videos state that you need to have a M3 Mac to achieve the desired resolution, maybe I need to do a bit more research, as for the PC it does mean that I will have to spend a bit of money on a suitable card, either the AMDASUS Radeon RX 9070 XT or the ASUS ROG Astral GeForce RTX 5090, either way it looks as though I will have to beg another lump sum from the Bank of Sue.
I am now retired and living on the Isle of Man, my background is as varied as it gets, ranging from Information Technology to Graphic Designer and 3D VFX Artist, using and teaching Autodesk Maya, Softimage, and Smoke, one of more enjoyable positions. Since Moving to the Isle of Man I try to keep myself to myself and work on the house, I don't do much with regards to Amateur Radio or Electronics anymore, but I am still interested in the hobby and may well get back into it one day....